University certificate
The world's largest faculty of video games”
Why study at TECH?
This Advanced master’s degree will allow you to master all the latest generation tools to create immersive experiences in Virtual Reality environments”
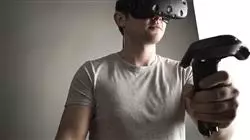
Today, Virtual Reality has become one of the most innovative and disruptive technologies in various fields, such as education, medicine, entertainment, advertising and business. Technological advances have allowed users to immerse themselves in virtual environments and live immersive 3D experiences. For this reason, there is an increasing need for professionals specialized in this area who are capable of creating this type of environments and experiences.
In response to this context, TECH has created this Advanced master’s degree, with which the professional will be able to master the latest techniques in Virtual Reality Design. In this way, the student will be able to master the use of specific software such as ZBrush, 3DS Max or Unity, also delving into the development of animation and 2D and 3D graphics. The designer will also have the opportunity to acquire organizational and management skills, dealing with the production and financing of video game projects.
One of the main advantages of this academic program is its 100% online methodology, which allows students to study from anywhere and at their own pace. They will benefit from the most advanced multimedia resources in the educational market, while receiving a complete preparation adapted to the professional environment by an expert and prestigious teaching staff. All this makes this degree an optimal option for professional advancement.
With this program you will be able to easily handle software such as ZBrush or Unity for design applied to Virtual Reality”
This Advanced master’s degree in VR Design contains the most complete and up-to-date program on the market. The most important features include:
- The development of practical cases presented by Virtual Reality experts
- The graphic, schematic, and practical contents with which they are created, provide scientific and practical information on the disciplines that are essential for professional practice
- Practical exercises where self-assessment can be used to improve learning
- Special emphasis on innovative methodologies in fashion design
- Theoretical lessons, questions to the expert, debate forums on controversial topics, and individual reflection assignments
- Content that is accessible from any fixed or portable device with an Internet connection
TECH's 100% online methodology will allow you to study when and where you want, without time constraints and without inconvenient travel to a study center”
The teaching staff is made up of design professionals who bring their professional experience to this program, as well as renowned specialists from prestigious societies and universities.
The multimedia content, developed with the latest educational technology, will provide the professional with situated and contextual learning, i.e., a simulated environment that will provide an immersive learning experience designed to prepare for real-life situations.
This program is designed around Problem-Based Learning, whereby the student must try to solve the different professional practice situations that arise throughout the program. For this purpose, the professional will be assisted by an innovative interactive video system created by renowned and experienced experts.
From 3D animation to Artificial Intelligence to Blender: you can study all this and more in this Advanced master’s degree”
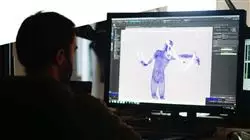
In order to improve your professional profile in the field of Design VR TECH will provide you with the best didactic resources: case studies, theoretical-practical activities, interactive summaries, etc”
Syllabus
The syllabus of this program is designed to provide students with a wide range of skills and knowledge to design immersive experiences in virtual reality. Program modules include the creation of characters and virtual environments, the use of game engines and 3D modeling tools, programming and interaction, as well as the design of immersive experiences and the implementation of real-time special effects. Students will also acquire critical and analytical skills to evaluate and improve the quality of their content, and learn to work in teams and communicate effectively in a professional environment.
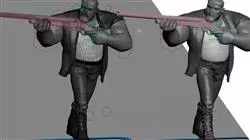
You are in front of the best academic program oriented to Virtual Reality design. Do not miss this opportunity and update Enroll”
Module 1. The Project and the Unity Graphics Engine
1.1. Design
1.1.1. Pureref
1.1.2. Scaling
1.1.3. Differences and Limitations
1.2. Project Planning
1.2.1. Modular Planning
1.2.2. Blockout
1.2.3. Assembly
1.3. Visualization in Unity
1.3.1. Setting up Unity for Oculus
1.3.2. The Oculus App
1.3.3. Collision and Camera Adjustments
1.4. Visualization in Unity: Scene
1.4.1. Setting up Scene for VR
1.4.2. Export of APKs
1.4.3. Installing APKs on Oculus Quest 2
1.5. Materials in Unity
1.5.1. Standard
1.5.2. Unlit: Features of This Material and When to Use It
1.5.3. Optimization
1.6. Textures in Unity
1.6.1. Importing Textures
1.6.2. Transparency
1.6.3. Sprite
1.7. Lighting
1.7.1. VR Lighting
1.7.2. The Lighting Menu in Unity
1.7.3. VR Skybox
1.8. Lighting: Lightmapping
1.8.1. Lightmapping Settings
1.8.2. Types of Lights
1.8.3. Emissive
1.9. Lighting 3: Baking
1.9.1. Baking
1.9.2. Ambient Occlusion
1.9.3. Optimization
1.10. Organizing and Exporting
1.10.1. Folders
1.10.2. Prefab
1.10.3. Exporting and Importing Unity Packages
Module 2. Blender
2.1. Interface
2.1.1. Software Blender
2.1.2. Controls and Shortcuts
2.1.3. Scenes and Customization
2.2. Modeling
2.2.1. Data Science
2.2.2. Mesh
2.2.3. Curves and Surfaces
2.3. Modifiers
2.3.1. Modifiers
2.3.2. How Are They Used
2.3.3. Types of Modifiers
2.4. Hard Surface Modeling
2.4.1. Prop Modeling
2.4.2. Prop Modeling’s Evolution
2.4.3. Prop Modeling’s Final Assessment
2.5. Materials
2.5.1. Assignment and Components
2.5.2. Creating Materials
2.5.3. Creating Procedural Materials
2.6. Animation and Rigging
2.6.1. Keyframes:
2.6.2. Armatures
2.6.3. Constraints
2.7. Simulation
2.7.1. Fluids
2.7.2. Hair and Particles
2.7.3. Clothing
2.8. Rendering
2.8.1. Cycles and Eevee
2.8.2. Light
2.8.3. Cameras
2.9. Grease Pencil
2.9.1. Structure and Primitives
2.9.2. Properties and Modifiers
2.9.3. Examples:
2.10. Geometry Nodes
2.10.1. Attributes
2.10.2. Types of Nodes
2.10.3. Practical Example
Module 3. 3ds MAX
3.1. Interface Set-Up
3.1.1. Project Start
3.1.2. Automatic and Incremental Saving
3.1.3. Measuring Units
3.2. The Create Menu
3.2.1. Objects
3.2.2. Light
3.2.3. Cylindrical and Spherical Objects
3.3. The Modify Menu
3.3.1. The Menu
3.3.2. Button Configuration
3.3.3. Uses
3.4. Edit Poly: Polygons
3.4.1. Edit Poly Mode
3.4.2. Edit Polygons
3.4.3. Edit Geometry
3.5. Edit Poly: Selection
3.5.1. Selection
3.5.2. Soft Selection
3.5.3. IDs and Smoothing Groups
3.6. The Hierarchy Menu
3.6.1. Pivot Conditions
3.6.2. Reset XFom and Freeze Transform
3.6.3. Adjusting the Pivot Menu
3.7. Material Editor
3.7.1. Compact Material Editor
3.7.2. Slate Material Editor
3.7.3. Multi/Sub-Object
3.8. Modifier List
3.8.1. Modeling Modifiers
3.8.2. Modeling Modifier Evolution
3.8.3. Modeling Modifier Final Assessment
3.9. XView and Non-Quads
3.9.1. XView
3.9.2. Checking for Errors in Geometry
3.9.3. Non-Quads
3.10. Exporting to Unity
3.10.1. Triangulating the Asset
3.10.2. Direct Signs X or Open Gl for Normal
3.10.3. Conclusions
Module 4. Zbrush
4.1. Zbrush
4.1.1. Polymesh
4.1.2. Subtools
4.1.3. Gizmo 3D
4.2. Creating Meshes
4.2.1. Quick Mesh and Primitives
4.2.2. Mesh Extract
4.2.3. Booleans
4.3. Sculpting
4.3.1. Symmetry
4.3.2. Main Brushes
4.3.3. Dynamesh
4.4. Masks
4.4.1. Brushes and the Mask Menu
4.4.2. Brush Masks
4.4.3. Polygroups
4.5. Sculpting Organic Prop K
4.5.1. Sculpting Low Poly
4.5.2. Low-Poly Sculpting Evolution
4.5.3. Low Poly Sculpting Final Assessment
4.6. IMM Brushes
4.6.1. Controls
4.6.2. Inserting Multi Mesh
4.6.3. Creating IMM Brushes
4.7. Curve Brushes
4.7.1. Controls
4.7.2. Creating Curve Brushes
4.7.3. IMM Curve Brushes
4.8. High Poly
4.8.1. Subdivisions and Dynamic Subdivisions
4.8.2. HD-Geometry
4.8.3. Projecting Noise
4.9. Other Types of Mesh
4.9.1. MicroMesh
4.9.2. NanoMesh
4.9.3. ArrayMesh
4.10. High-Poly Organic Prop Sculpting
4.10.1. Prop Sculpting
4.10.2. Prop Sculpting Evolution
4.10.3. Prop Sculpting Final Assessment
Module 5. Retopology
5.1. Retopology in ZBrush-ZRemesher
5.1.1. ZRemesher
5.1.2. Guidelines
5.1.3. Examples:
5.2. Retopology in ZBrush-Decimation Master
5.2.1. Decimation Master
5.2.2. Combining It with Brushes
5.2.3. Workflow
5.3. Retopology in ZBrush-ZModeler
5.3.1. Zmodeler
5.3.2. Modes
5.3.3. Correcting Meshes
5.4. Prop Retopology
5.4.1. Hard Surface Prop Retopology
5.4.2. Organic Prop Retopology
5.4.3. Hand Retopology
5.5. Topogun
5.5.1. Advantages of Topogun
5.5.2. The Interface
5.5.3. Import
5.6. Tools: Edit
5.6.1. Simple Edit Tool
5.6.2. Simple Create Tool
5.6.3. Draw Tool
5.7. Tools: Bridge
5.7.1. Bridge Tool
5.7.2. Brush Tool
5.7.3. Extrude Tool
5.8. Tools: Tubes
5.8.1. Tubes Tool
5.8.2. Symmetry Set-Up
5.8.3. Feature Subdivision and Map Baking
5.9. Head Retopology
5.9.1. Facial Loops
5.9.2. Mesh Optimization
5.9.3. Export
5.10. Full Body Retopology
5.10.1. Body Loops
5.10.2. Mesh Optimization
5.10.3. VR Requirements
Module 6. UVs
6.1. Advanced UVS
6.1.1. Warnings
6.1.2. Cuts
6.1.3. Texture Density
6.2. Creating UVS in ZBrush-UVMaster
6.2.1. Controls
6.2.2. Unwrap
6.2.3. Unusual Topology
6.3. UVMaster: Painting
6.3.1. Painting Control
6.3.2. Creating Seams
6.3.3. Checkseams
6.4. UVMaster: Packing
6.4.1. UV Packing
6.4.2. Creating Islands
6.4.3. Flatten
6.5. UVMaster: Clones
6.5.1. Working With Clones
6.5.2. Polygroups
6.5.3. Control Painting
6.6. Rizom UV
6.6.1. Rizom Script
6.6.2. The Interface
6.6.3. Importing With or Without UVS
6.7. Seams and Cuts
6.7.1. Keyboard Shortcuts
6.7.2. 3D Panel
6.7.3. UV Panel
6.8. UV Unwrap and Layout Panel
6.8.1. Unfold
6.8.2. Optimize
6.8.3. Layout and Packing
6.9. UV: More Tools
6.9.1. Align, Straighten, Flip, and Fit
6.9.2. TopoCopy and Stack1
6.9.3. Edge Loop Parameters
6.10. Advanced UV Rizom
6.10.1. Auto Seams
6.10.2. UVS Channels
6.10.3. Texel Density
Module 7. Baking
7.1. Model Baking
7.1.1. Preparing the Model for Baking
7.1.2. Baking Principles
7.1.3. Processing Options
7.2. Model Baking painter
7.2.1. Baking in Painter
7.2.2. Low Poly Baking
7.2.3. High Poly Baking
7.3. Model Baking: Boxes
7.3.1. Using Boxes
7.3.2. Adjusting Distances
7.3.3. Computing Tangent Space per Fragment
7.4. Map Baking
7.4.1. Normal
7.4.2. ID
7.4.3. Ambient Occlusion
7.5. Map Baking: Curvatures
7.5.1. Curvature
7.5.2. Thickness
7.5.3. Improving Map Quality
7.6. Baking in Marmoset
7.6.1. Marmoset
7.6.2. Functions
7.6.3. Real-Time Baking
7.7. Setting Up the Document for Baking in Marmoset
7.7.1. High Poly and Low Poly in 3DSMax Max
7.7.2. Organizing the Scene in Marmoset
7.7.3. Verifying That Everything Is Correct
7.8. Bake Project Panel
7.8.1. Bake Group, High and Low
7.8.2. The Geometry Menu
7.8.3. Load
7.9. Advanced Options
7.9.1. Output
7.9.2. Adjusting the Cage
7.9.3. Setting Up Maps
7.10. Baking
7.10.1. Maps
7.10.2. Result Preview
7.10.3. Baking Floating Geometry
Module 8. Substance Painter
8.1. Creating a Project
8.1.1. Importing Maps
8.1.2. UVs
8.1.3. Baking
8.2. Layers
8.2.1. Types of Layers
8.2.2. Layer Options
8.2.3. Materials
8.3. Painting
8.3.1. Types of Brushes
8.3.2. Filling Projections
8.3.3. Advance Dynamic Painting
8.4. Effects
8.4.1. Filling
8.4.2. Levels
8.4.3. Anchor Points
8.5. Masks
8.5.1. Alphas
8.5.2. Procedurals and Grunges
8.5.3. Hard Surfaces
8.6. Generators
8.6.1. Generators
8.6.2. Uses
8.6.3. Examples:
8.7. Filters
8.7.1. Filters
8.7.2. Uses
8.7.3. Examples:
8.8. Hard Surface Prop Texturing
8.8.1. Prop Texturing
8.8.2. Prop Texturing Evolution
8.8.3. Prop Texturing Final Assessment
8.9. Texturing Organic Prop
8.9.1. Prop Texturing
8.9.2. Prop Texturing Evolution
8.9.3. Prop Texturing Final Assessment
8.10. Render
8.10.1. IRay
8.10.2. Post-Processing
8.10.3. Col Use
Module 9. Marmoset
9.1. The Alternative
9.1.1. Import
9.1.2. Interface
9.1.3. Viewport
9.2. Classic
9.2.1. Scene
9.2.2. Tool Settings
9.2.3. History
9.3. Inside Scene
9.3.1. Render
9.3.2. Main Camera
9.3.3. Sky
9.4. Lights
9.4.1. Types
9.4.2. Shadow Catcher
9.4.3. Fog
9.5. Texture
9.5.1. Texture Project
9.5.2. Map Import
9.5.3. Viewport
9.6. Layers: Paint
9.6.1. Paint Layer
9.6.2. Fill Layer
9.6.3. Group
9.7. Layers: Adjustments
9.7.1. Adjustment Layer
9.7.2. Input Processor Layer
9.7.3. Procedural Layer
9.8. Layers: Mask
9.8.1. Mask
9.8.2. Channels
9.8.3. Maps
9.9. Materials
9.9.1. Types of Material
9.9.2. Settings
9.9.3. Applying Them to the Scene
9.10. Dossier
9.10.1. Marmoset Viewer
9.10.2. Exporting Render Images
9.10.3. Exporting Videos
Module 10. Sci-Fi Environment
10.1. Sci-Fi Concept and Planning
10.1.1. References
10.1.2. Planning
10.1.3. Blockout
10.2. Implementation in Unity
10.2.1. Importing Blockout and Verifying Scaling
10.2.2. Skybox
10.2.3. Files and Preliminary Materials
10.3. Module 1: Floors
10.3.1. High to Low Modular Modeling
10.3.2. UVS and Baking
10.3.3. Texturing
10.4. Module 2: Walls
10.4.1. High to Low Modular Modeling
10.4.2. UVS and Baking
10.4.3. Texturing
10.5. Module 3: Roofs
10.5.1. High to Low Modular Modeling
10.5.2. Retopology, UVs, and Baking
10.5.3. Texturing
10.6. Module 4: Extras (Pipes, Railings, Etc.)
10.6.1. High to Low Modular Modeling
10.6.2. UVS and Baking
10.6.3. Texturing
10.7. Hero Asset 1: Mechanical Doors
10.7.1. High to Low Modular Modeling
10.7.2. Retopology, UVs, and Baking
10.7.3. Texturing
10.8. Hero Asset 2: Hibernation Chamber
10.8.1. High to Low Modular Modeling
10.8.2. Retopology, UVs, and Baking
10.8.3. Texturing
10.9. In Unity
10.9.1. Importing Textures
10.9.2. Application of Materials
10.9.3. Scene Lighting
10.10. End of Project
10.10.1. VR Visualization
10.10.2. Prefab and Export
10.10.3. Conclusions
Module 11. The 3D Industry
11.1. 3D Industry in Animation and Video Games
11.1.1. 3D Animation
11.1.2. 3D Industry in Animation and Video Games
11.1.3. 3D Animation Future
11.2. 3D in Video Games
11.2.1. Video Games Limitations
11.2.2. 3D Video Game Development Difficulties
11.2.3. Solutions to Video Game Development Difficulties
11.3. 3D Software for Video Games
11.3.1. Maya. Pros and Cons
11.3.2. 3Ds Max. Pros and Cons
11.3.3. Blender. Pros and Cons
11.4. Pipeline in 3D Asset Generation for Video Games
11.4.1. Idea and Assembly from a Modelsheet
11.4.2. Modeling with Low Geometry and High Detailing
11.4.3. Projection of Textured Details
11.5. Key Artistic 3D Styles for Video Games
11.5.1. Cartoon Style
11.5.2. Realistic Style
11.5.3. Cel Shading
11.5.4. Motion Capture
11.6. 3D Integration
11.6.1. 2D Digital World Integration
11.6.2. 3D Digital World Integration
11.6.3. Real-World Integration (AR, MR/XR)
11.7. Key 3D Factors for Different Industries
11.7.1. 3D in Film and Series
11.7.2. 3D in Video Games
11.7.3. 3D in Marketing
11.8. Render: Real-time Rendering and Pre-Rendering
11.8.1. Lighting
11.8.2. Shadow Definition
11.8.3. Quality vs Speed
11.9. 3D Asset Generation in 3D Max
11.9.1. 3D Max Software
11.9.2. Interface, Menus, Toolbars
11.9.3. Controls
11.9.4. Scene
11.9.5. Viewports
11.9.6. Basic Shapes
11.9.7. Object Generation, Modification and Transformation
11.9.8. 3D Scene Creation
11.9.9. 3D Professional Asset Modeling for Video Games
11.9.10. Material Editors
11.9.10.1. Creating and Editing Materials
11.9.10.2. Applying Light to Materials
11.9.10.3. UVW Map Modifier. Mapping Coordinates
11.9.10.4. Texture Creation
11.10. Workspace Organization and Best Practices
11.10.1. Creation of a Project
11.10.2. Folder Structure
11.10.3. Custom Functionality
Module 12. Art and 3D in the Video Game Industry
12.1. 3D VR Projects
12.1.1. 3D Mesh Creation Software
12.1.2. Image Editing Software
12.1.3. Virtual Reality
12.2. Typical Problems, Solutions and Project Needs
12.2.1. Project Needs
12.2.2. Possible Problems
12.2.3. Solutions
12.3. Aesthetic Line Study for the Artistic Style Generation in Video Games: From Game Design to 3D Art Generation
12.3.1. Choice of Video Game Recipient. Who We Want to Reach
12.3.2. Developer's Artistic Possibilities
12.3.3. Final Definition of the Aesthetic Line
12.4. Aesthetic Benchmarking and Competitor Analysis
12.4.1. Pinterest and Similar Sites
12.4.2. Modelsheet Creation
12.4.3. Competitor Search
12.5. Bible Creation and Briefing
12.5.1. Bible Creation
12.5.2. Bible Development
12.5.3. Briefing Development
12.6. Scenarios and Assets
12.6.1. Production Asset Planning at Production Levels
12.6.2. Scenario Design
12.6.3. Asset Design
12.7. Asset Integration in Levels and Tests
12.7.1. Integration Process at All Levels
12.7.2. Texture
12.7.3. Final Touches
12.8. Characters
12.8.1. Character Production Planning
12.8.2. Character Design
12.8.3. Character Asset Design
12.9. Character Integration in Scenarios and Tests
12.9.1. Character Integration Process in Levels
12.9.2. Project Needs
12.9.3. Animations
12.10. 3D Video Game Audio
12.10.1. Project Dossier Interpretation for Sound Identity Generation of Video Games
12.10.2. Composition and Production Processes
12.10.3. Soundtrack Design
12.10.4. Sound Effect Design
12.10.5. Voice Design
Module 13. Advanced 3D
13.1. Advanced 3D Modeling Techniques
13.1.1. Interface Configuration
13.1.2. Modeling Observation
13.1.3. Modeling in High
13.1.4. Organic Modeling for Videogames
13.1.5. Advanced 3D Object Mapping
13.2. Advanced 3D Texturing
13.2.1. Substance Painter Interfaces
13.2.2. Materials, Alphas and Brush Use
13.2.3. Particle Use
13.3. 3D Software and Unreal Engine Export
13.3.1. Unreal Engine Integration in Designs
13.3.2. 3D Model Integration
13.3.3. Unreal Engine Texture Application
13.4. Digital Sculpting
13.4.1. DigitalSculpting with ZBrush
13.4.2. First Steps in ZBrush
13.4.3. Interface, Menus and Navigation
13.4.4. Reference Images
13.4.5. Full 3D Modeling of Objects in ZBrush
13.4.6. Base Mesh Use
13.4.7. Part Modeling
13.4.8. 3D Model Export in ZBrush
13.5. Polypaint Use
13.5.1. Advanced Brushes
13.5.2. Texture
13.5.3. Default Materials
13.6. Rheopology
13.6.1. Rheopology Use in the Video Game Industry
13.6.2. Low-Poly Mesh Creation
13.6.3. Software Use for Rhetopology
13.7. 3D Model Positions
13.7.1. Reference Image Viewers
13.7.2. Transpose Use
13.7.3. Transpose Use for Models Composed of Different Pieces
13.8. 3D Model Export
13.8.1. 3D Model Export
13.8.2. Texture Generation for Exportation
13.8.3. 3D Model Configuration with the Different Materials and Textures
13.8.4. Preview of the 3D Model
13.9. Advanced Working Techniques
13.9.1. 3D Modeling Workflow
13.9.2. 3D Modeling Work Process Organization
13.9.3. Production Effort Estimates
13.10. Model Finalization and Export for Other Programs
13.10.1. Workflow for Model Finalization
13.10.2. Zpluging Exportation
13.10.3. Possible Files. Advantages and Disadvantages
Module 14. 3D Animation
14.1. Software Operation
14.1.1. Information Management and Work Methodology
14.1.2. Animation
14.1.3. Timing and Weight
14.1.4. Animation With Basic Objects
14.1.5. Direct and Inverse Cinematics
14.1.6. Inverse Kinematics
14.1.7. Kinematic Chain
14.2. Anatomy. Biped vs. Quadruped
14.2.1. Biped
14.2.2. Quadruped
14.2.3. Walking Cycle
14.2.4. Running Cycle
14.3. Facial Rig and Morpher
14.3.1. Facial Language. Lip-Sync, Eyes and Focal Points
14.3.2. Sequence Editing
14.3.3. Phonetics. Importance
14.4. Applied Animation
14.4.1. 3D Animation for Film and Television
14.4.2. Animation for Video Games
14.4.3. Animation for Other Applications
14.5. Motion Capture with Kinect
14.5.1. Motion Capture for Animation
14.5.2. Sequence of Movements
14.5.3. Blender Integration
14.6. Skeleton, Skinning and Setup
14.6.1. Interaction Between Skeleton and Geometry
14.6.2. Mesh Interpolation
14.6.3. Animation Weights
14.7. Acting
14.7.1. Body Language
14.7.2. Poses
14.7.3. Sequence Editing
14.8. Cameras and Plans
14.8.1. The Camera and the Environment
14.8.2. Composition of the Shot and the Characters
14.8.3. Finishes
14.9. Visual Special Effects
14.9.1. Visual Effects and Animation
14.9.2. Types of Optical Effects
14.9.3. 3D VFX L
14.10. The Animator as an Actor
14.10.1. Expressions
14.10.2. Actors' References
14.10.3. From Camera to Program
Module 15. Unity 3D and Artificial Intelligence Proficiency
15.1. Video Games 3D Unity
15.1.1. Video Games
15.1.2. Video Games Errors and Hits
15.1.3. Video Game Applications in Other Areas and Industries
15.2. Video Game Development. 3D Unity
15.2.1. Production Plan and Development Phases
15.2.2. Development Methodology
15.2.3. Patches and Additional Content
15.3. 3D Unity
15.3.1. Unity 3D. Applications
15.3.2. Unity 3D Scripting
15.3.3. Asset Store and Third-Party Plugins
15.4. Physics, Inputs
15.4.1. InputSystem
15.4.2. Physics in Unity 3D
15.4.3. Animation and Animator
15.5. Unity Prototyping
15.5.1. Blocking and Colliders
15.5.2. Pre-Fabs
15.5.3. Scriptable Objects
15.6. Specific Programming Techniques
15.6.1. Singleton Model
15.6.2. Loading of Resources in the Execution of Windows Games
15.6.3. Performance and Profiler
15.7. Video Games for Mobile Devices
15.7.1. Games for Android Devices
15.7.2. Games for IOS Devices
15.7.3. Multiplatform Developments
15.8. Augmented Reality
15.8.1. Types of Augmented Reality games
15.8.2. ARkit and ARcore
15.8.3. Vuforia Development
15.9. Artificial Intelligence Programming
15.9.1. Artificial Intelligence Algorithms
15.9.2. Finite State Machines
15.9.3. Neural Networks
15.10. Distribution and Marketing
15.10.1. The art of Publishing and Promoting a Video Game
15.10.2. The Responsible for Success
15.10.3. Strategies
Module 16. 2D and 3D Video Game Development
16.1. Raster Graphic Resources
16.1.1. Sprites
16.1.2. Atlas
16.1.3. Texture
16.2. Interface and Menu Development
16.2.1. Unity GUI
16.2.2. Unity UI
16.2.3. UI Toolkit
16.3. Animation System
16.3.1. Animation Curves and Keys
16.3.2. Applied Animation Events
16.3.3. Modifiers
16.4. Materials and Shaders
16.4.1. Material Components
16.4.2. RenderPass Types
16.4.3. Shaders
16.5. Particles
16.5.1. Particle Systems
16.5.2. Transmitters and Sub-Transmitters
16.5.3. Scripting
16.5.4. Lighting
16.6. Lighting Modes
16.6.1. Light Baking
16.6.2. Light Probes
16.7. Mecanim
16.7.1. State Machines, SubState Machines and Transitions between Animations
16.7.2. Blend Trees
16.7.3. Animation Layers and IK
16.8. Cinematic Finish
16.8.1. Timeline
16.8.2. Post-Processing Effects
16.8.3. Universal Render and High-Definition Render Pipeline
16.9. Advanced VFX
16.9.1. VFX Graph
16.9.2. Shader Graph
16.9.3. Pipeline Tools
16.10. Audio Components
16.10.1. Audio Source and Audio Listener
16.10.2. Audio Mixer
16.10.3. Audio Spatializer
Module 17. Programming, Mechanics Generation and Video Game Prototyping Techniques
17.1. Technical Process
17.1.1. Low-Poly and High-Poly Unity Models
17.1.2. Material Settings
17.1.3. High-Definition Render Pipeline
17.2. Character Design
17.2.1. Movement
17.2.2. Collider Design
17.2.3. Creation and Behavior
17.3. Importing Skeletal Meshes into Unity
17.3.1. Exporting Skeletal Meshes from the 3D Software
17.3.2. Skeletal Meshes in Unity
17.3.3. Anchor Points for Accessories
17.4. Importing Animations
17.4.1. Animation Preparation
17.4.2. Importing Animations
17.4.3. Animator and Transitions
17.5. Animation Editor
17.5.1. Blend Spaces Creation
17.5.2. Creating Animation Montage
17.5.3. Editing Read-Only Animations
17.6. Ragdoll Creation and Simulation
17.6.1. Configuration of a Ragdoll
17.6.2. Ragdoll to an Animation Graph
17.6.3. Simulation of a Ragdoll
17.7. Resources for Character Creation
17.7.1. Libraries
17.7.2. Importing and Exporting Library Materials
17.7.3. Handling of Materials
17.8. Work Teams
17.8.1. Hierarchy and Work Roles
17.8.2. Version Control Systems
17.8.3. Conflict Resolution
17.9. Requirements for Successful Development
17.9.1. Production for Success
17.9.2. Optimal Development
17.9.3. Essential Requirements
17.10. Publication Packaging
17.10.1. Player Settings
17.10.2. Build
17.10.3. Installer Creation
Module 18. VR Immersive Game Development
18.1. Uniqueness of VR
18.1.1. Traditional Video Games and VR. Differences
18.1.2. Motion Sickness: Smoothness vs. Effects
18.1.3. Unique VR Interactions
18.2. Interaction
18.2.1. Events
18.2.2. Physical Triggers
18.2.3. Virtual vs Real world
18.3. Immersive Locomotion
18.3.1. Teletransportation
18.3.2. Arm Swinging
18.3.3. Forward Movement With and Without Facing
18.4. VR Physics
18.4.1. Grippable and Throwable Objects
18.4.2. Weight and Mass in VR
18.4.3. Gravity in VR
18.5. UI in VR
18.5.1. Positioning and Curvature of UI Elements
18.5.2. VR Menu Interaction Modes
18.5.3. Best Practices for Comfortable Experiences
18.6. VR Animation
18.6.1. Animated Model Integration in VR
18.6.2. Animated Objects and Characters vs. Physical Objects
18.6.3. Animated vs. Procedural Transitions
18.7. Avatars
18.7.1. Avatar Representation from Your Own Eyes
18.7.2. External Representation of Avatars
18.7.3. Inverse Cinematic and Procedural Avatar Animation
18.8. Audio
18.8.1. Configuring Audio Sources and Audio Listeners for VR
18.8.2. Effects Available for More Immersive Experiences
18.8.3. VR Audio Spatializer
18.9. VR and AR Project Optimization
18.9.1. Occlusion Culling
18.9.2. Static Batching
18.9.3. Quality Settings and Render Pass Types
18.10. Practice: VR Escape Room
18.10.1. Experience Design
18.10.2. Scenario Layout
18.10.3. Mechanic Development
Module 19. Professional Audio for 3D VR Video Games
19.1. Professional 3D Video Games Audio
19.1.1. Video Game Audio
19.1.2. Audio Style Types in Current Video Games
19.1.3. Spatial Audio Models
19.2. Preliminary Material Study
19.2.1. Game Design Documentation Study
19.2.2. Level Design Documentation Study
19.2.3. Complexity and Typology Evaluation to Create Audio Projects
19.3. Sound Reference Studio
19.3.1. Main References List by Similarity with the Project
19.3.2. Auditory References from Other Media to Give Video Games' Identity
19.3.3. Reference Study and Drawing of Conclusions
19.4. Sound Identity Design for Video Games
19.4.1. Main Factors Influencing the Project
19.4.2. Relevant Aspects in Audio Composition: Instrumentation, Tempo, etc
19.4.3. Voice Definition
19.5. Soundtrack Creation
19.5.1. Environment and Audio Lists
19.5.2. Definition of Motif, Themes and Instrumentation
19.5.3. Composition and Audio Testing of Functional Prototypes
19.6. Sound Effect Creation (FX)
19.6.1. Sound Effects: FX Types and Complete Lists According to Project Needs
19.6.2. Definition of Motif, Themes and Creation
19.6.3. Sound FX Evaluation and Functional Prototype Testing
19.7. Voice Creation
19.7.1. Voice Types and Phrase Listing
19.7.2. Search and Evaluation of Voice Actors and Actresses
19.7.3. Recording Evaluation and Testing of Voices on Functional Prototypes
19.8. Audio Quality Evaluation
19.8.1. Elaboration of Listening Sessions with the Development Team
19.8.2. All Audio Integration into Working Prototypes
19.8.3. Testing and Evaluation of the Results Obtained
19.9. Project Exporting, Formatting and Importing Audio
19.9.1. Video Game Audio Formats and Compression
19.9.2. Exporting Audio
19.9.3. Importing Project Audio
19.10. Preparing Audio Libraries for Marketing
19.10.1. Versatile Sound Library Design for Video Game Professionals
19.10.2. Audio Selection by Type: Soundtrack, FX and Voices
19.10.3. Audio Asset Library Marketing
Module 20. Video Game Production and Financing
20.1. Video Game Production
20.1.1. Cascading Methodologies
20.1.2. Case studies on Lack of Project Management and Work Plan
20.1.3. Consequences of the Lack of a Production Department in the Video Game Industry
20.2. Development Teams
20.2.1. Key Departments in Project Development
20.2.2. Key Profiles in Micro-Management: LEAD and SENIOR
20.2.3. Problems of Lack of Experience in JUNIOR Profiles
20.2.4. Establishment of Training Plan for Low-Experience Profiles
20.3. Agile Methodologies in Video Game Development
20.3.1. SCRUM
20.3.2. AGILE
20.3.3. Hybrid Methodologies
20.4. Effort, Time and Cost Estimates
20.4.1. Video Game Development Costs: Main Concepts and Expenses
20.4.2. Task Scheduling: Critical Points, Keys and Aspects to Consider
20.4.3. Estimates based on VS Stress Points Calculated in Hours
20.5. Prototype Planning Prioritization
20.5.1. Establishment of General Project Objectives
20.5.2. Prioritization of Key Functionalities and Contents: Order and Needs by Department
20.5.3. Grouping of Functionalities and Contents in Production to Constitute Deliverables (Functional Prototypes)
20.6. Best Practices in Video Game Production
20.6.1. Meetings, Dailies, Weekly Meetings, End of Sprint Meetings, and ALPHA, BETA and RELEASE Milestone Review Meetings
20.6.2. Sprint Speed Measurement
20.6.3. Lack of Motivation and Low Productivity Detection and Anticipation of Potential Production Problems
20.7. Production Analysis
20.7.1. Preliminary Analysis I: Market Status Review
20.7.2. Preliminary Analysis 2: Establishment of Main Project References (Direct Competitors)
20.7.3. Previous Analyses Conclusions
20.8. Development Cost Calculation
20.8.1. Human resources
20.8.2. Technology and Licensing
20.8.3. External Development Expenses
20.9. Investment Search
20.9.1. Types of Investors
20.9.2. Executive Summary
20.9.3. Pitch Deck
20.9.4. Publishers
20.9.5. Self-Financing
20.10. Project Post-Mortem Elaboration
20.10.1. Post-Mortem Elaboration Process in the Company
20.10.2. Positive Aspect Analysis of the Project
20.10.3. Negative Aspect Analysis of the Project
20.10.4. Improvement Proposal on the Project's Negative Points and Conclusions

This is the most complete and updated syllabus to become an outstanding professional in the area of Virtual Reality”
Advanced Master's Degree in VR Design
Dive into the exciting world of video game design in virtual reality with the Advanced Master's Degree in VR Design program in the area of video games at TECH Global University, the world's leading institute in higher distance education. This virtual postgraduate program will provide you with comprehensive and updated training in the latest trends in virtual reality game design, preparing you to face the challenges and opportunities of the digital entertainment industry. You will learn to develop innovative and exciting concepts, design 3D environments and characters, create interactive game mechanics and use specialized virtual reality tools and technologies.
With the Advanced Master's Degree in VR Design, you will be ready to enter the fascinating world of virtual reality gaming, where you will be able to create immersive and exciting experiences for different platforms and devices. Our virtual classroom program is designed to provide you with a complete and updated education, with a practical approach and innovative methodologies that will allow you to develop technical and creative skills in virtual reality game design. Prepare yourself to be a technology leader by studying at the best online university in the world and make a difference in this exciting and evolving field.
