University certificate
The world's largest faculty of design”
Why study at TECH?
This program will allow you to work in the video game industry or in major film productions thanks to the innovative 3D modeling techniques that you will be able to incorporate into your daily work"
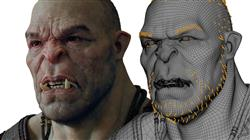
Today, the entertainment industry has reached billions of people. In any country, people of different ages and backgrounds enjoy a movie, a TV series or a video game. However, these audiovisual products have evolved significantly in recent years, driven by recent technological innovations. Thus, cinema has now been able to integrate all kinds of digital models, saving production costs and speeding up filming. Similarly, video games have evolved enormously thanks to new graphics engines capable of supporting highly detailed designs.
All these advances would not be possible without 3D Modeling professionals and the latest techniques in this area. This Advanced Master ‘s Degree has been designed with the aim of bringing the designer closer to the best 3D modeling tools, for which it has integrated in a single program the fundamental elements of organic modeling, texture modeling and hardsurface modeling. Therefore, this degree can mean a great progress for the professional, who will become a great expert in this field by having all the latest knowledge and procedures in this exciting and complex field.
In this way, you will be able to deepen in the use of utilities such as Substance Painter,Blender, 3DS Max, Unreal or Marmoset Toolbag. All this, focused on the different areas of 3D Modeling and with an eminently practical perspective. In addition, you will have the best online teaching methodology, which will adapt to your personal circumstances, allowing you to study when and where you want. Likewise, you will have at your disposal the best teaching staff, composed of active specialists who will provide you with the latest developments in this field, accompanied by the best multimedia materials.
Thanks to this Advanced master’s degree, you will be able to delve into the use of tools such as Unreal, 3DS Max or Substance Painter"
This Advanced master’s degree in Integral 3D Modeling contains the most complete and up-to-date Educational program on the market. The most important features include:
- The development of case studies presented by experts in 3D Modeling
- The graphic, schematic, and eminently practical contents with which they are created, provide scientific and practical information on the disciplines that are essential for professional practice
- Practical exercises where self-assessment can be used to improve learning
- Its special emphasis on innovative methodologies in design and 3D Modeling
- Theoretical lessons, questions to the expert, debate forums on controversial topics, and individual reflection assignments
- Content that is accessible from any fixed or portable device with an Internet connection
3D Modeling offers tremendous career opportunities and, thanks to this program, you will be ready to work with the best companies in the world in sectors such as film"
Its teaching staff includes professionals belonging to the field of 3D Modeling, who bring to this program the experience of their work, in addition to recognized specialists from prestigious reference societies and universities.
The multimedia content, developed with the latest educational technology, will provide the professional with situated and contextual learning, i.e., a simulated environment that will provide an immersive training experience designed to train for real-life situations.
This program is designed around Problem Based Learning, whereby the student must try to solve the different professional practice situations that arise during the academic year. For this purpose, the professional will be assisted by an innovative interactive video system created by renowned and experienced experts.
TECH's online methodology adapts to your professional circumstances, since you can study when and where you want, without rigid schedules or uncomfortable commuting"
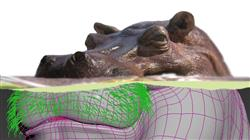
The best teaching staff is waiting for you to transmit the latest advances in 3D Modeling, preparing you to face the present and future challenges of this exciting field"
Syllabus
The contents of this Advanced master’s degree have been carefully elaborated by internationally renowned experts. These experts have ensured that the professional has access to the best knowledge in this field, since this program incorporates the latest developments in aspects such as the principles of Hard Surface modeling, advanced modeling in Rhino, retopology and Maya modeling or UV preparation for UDIM systems focused on large production models, among many others.
There is no program more complete and up-to-date than this one to learn more about the latest developments in 3D Modeling"
Module 1. Anatomy
1.1. General Skeletal Masses, Proportions
1.1.1. Bones
1.1.2. Human Face
1.1.3. Anatomic Canons
1.2. Anatomical Differences Between Genders and Sizes
1.2.1. Shapes Applied to Characters
1.2.2. Curves and Straight Lines
1.2.3. Bone, Muscle and Skin Behavior
1.3. Head
1.3.1. Skull
1.3.2. Head Muscles
1.3.3. Layers: Skin, Bone and Muscle Facial Expressions
1.4. Torso
1.4.1. Torso Musculature
1.4.2. Central Axis of the Body
1.4.3. Different Torsos
1.5. Arms
1.5.1. Joints: Shoulder, Elbow and Wrist
1.5.2. Arm Muscle Behavior
1.5.3. Skin Detail
1.6. Hand Sculpting
1.6.1. Hand Bones
1.6.2. Muscles and Tendons of the Hand
1.6.3. Skin and Wrinkles on the Hands
1.7. Leg Sculpting
1.7.1. Joints: Hip, Knee and Ankle
1.7.2. Leg Muscles
1.7.3. Skin Detail
1.8. Feet
1.8.1. Bone Construction for the Foot
1.8.2. Muscles and Tendons of the Foot
1.8.3. Skin and Wrinkles on the Feet
1.9. Composition of the Whole Human Figure
1.9.1. Complete Creation of a Human Base
1.9.2. Joint and Muscle Attachment
1.9.3. Skin Composition, Pores and Wrinkles
1.10. Complete Human Model
1.10.1. Model Polishing
1.10.2. Hyper Skin Detail
1.10.3. Composition
Module 2. Retopology and Maya Modeling
2.1. Advanced Facial Retopology
2.1.1. Importing into Maya and the Use of l QuadDraw
2.1.2. Retopology of the Human Face
2.1.3. Loops
2.2. Retopology of the Human Body
2.2.1. Creation of Loops in the Joints
2.2.2. Ngons and Tris and When to Use Them
2.2.3. Topology Refinement
2.3. Retopology of Hands and Feet
2.3.1. Movement of Small Joints
2.3.2. Loops y Support Edges to Improve the Base Mesh of Feet and Hands
2.3.3. Difference of Loops for Different Hands and Feet
2.4. Differences Between Maya Modeling vs ZBrush Sculpting
2.4.1. Diferent Workflow for Modeling
2.4.2. Base Model Low Poly
2.4.3. High Poly Model
2.5. Creation of a Human Model from Scratch in Maya
2.5.1. Human Model Starting from the Hip
2.5.2. General Base Form
2.5.3. Hands and Feet and Their Topology
2.6. Transformation of Low Poly Model to High Poly
2.6.1. Zbrush
2.6.2. High poly: Differences Between Divide and Dynamesh
2.6.3. Sculpting Form: Alteration Between Low Poly and High Poly
2.7. Application of Details in Zbrush: Pores, Capillaries, etc.
2.7.1. Alphas and Different Brushes
2.7.2. Detail: Brush Dam-Standard
2.7.3. Projections and Surfaces in Zbrush
2.8. Advanced Creation for the Eyes in Maya
2.8.1. Creation of the Spheres: Sclera, Cornea and Iris
2.8.2. Lattice Tools
2.8.3. Displacement Map From ZBrush
2.9. Use of Deformers in Maya
2.9.1. Maya Deformers
2.9.2. Topology Movement: Polish
2.9.3. Final Maya Polish
2.10. Creation of Final Uv's and Application of Displacement Mapping
2.10.1. Character Uv's and Importance of Sizes
2.10.2. Texturing
2.10.3. Displacement Map
Module 3. UV's and Texturing with AllegorithmicSubstance Painter and Mari
3.1. Creation of High-Level UV's in Maya
3.1.1. Facial UV’s
3.1.2. Creation and Layout
3.1.3. Advanced UV's
3.2. UV Preparation for UDIM Systems Focused on High Throughput Models
3.2.1. UDIM
3.2.2. UDIM in Maya
3.2.3. UV Preparation for UDIM Systems Focused on Large-Scale Production Models
3.3. XYZ Textures What are They and How to Use Them?
3.3.1. XYZ Hyperrealism
3.3.2. MultiChannel Maps
3.3.3. Texture Maps
3.4. Texturing: Videogames and Cinema
3.4.1. Substance Painter
3.4.2. Mari
3.4.3. Types of Texturing
3.5. Texturing in Substance Painter for Videogames
3.5.1. Baking from High to Low Poly
3.5.2. PBR Textures and Their Importance
3.5.3. Zbrush with Substance Painter
3.6. Finalize Our Textures of Substance Painter
3.6.1. Scattering, Translucency
3.6.2. Model Texturing
3.6.3. Scars, Freckles, Tattoos, Paints or Makeup
3.7. Hyper-realistic Facial Texturing with XYZ Textures and Color Mapping
3.7.1. XYZ Textures in Zbrush
3.7.2. Wrap
3.7.3. Error Correction
3.8. Hyper-realistic Facial Texturing with XYZ Textures and Color Mapping
3.8.1. Mari's Interface
3.8.2. Texturing in Mari
3.8.3. Projection of Skin Textures
3.9. Advanced Detailing of Displacements Maps in Zbrush and Mari
3.9.1. Texture Painting
3.9.2. Displacement for Hyperrealism
3.9.3. Creation of Layers
3.10. Shadingand Implementation of Textures in Maya
3.10.1. Skin Shaders in Arnold
3.10.2. Hyperrealistic Eye
3.10.3. Touch-ups and Tips
Module 4. Rendering, Lighting and Model Posing
4.1. Character Posing in ZBrush
4.1.1. Rig in ZBrush with ZSpheres
4.1.2. Transpose Master
4.1.3. Professional Finish
4.2. Rigging and Heavy from Our Own Skeleton in Maya
4.2.1. Rig in Maya
4.2.2. Rigging Tools with Advance Skeleton
4.2.3. Rig Weighing
4.3. Blend Shapes to Give Life to Your Character's Face
4.3.1. Facial Expressions
4.3.2. Maya Blend shapes
4.3.3. Animation with Maya
4.4. Mixamo, a Quick Way to Present Our Model
4.4.1. Mixamo
4.4.2. Mixamo Rigs
4.4.3. Animations
4.5. Lighting Concepts
4.5.1. Lighting Techniques
4.5.2. Light and Color
4.5.3. Shadows
4.6. Lights and Parameters of Arnold Render
4.6.1. Lights with Arnold and Maya
4.6.2. Control and Parameters of Lights
4.6.3. Arnold Parameters and Configuration
4.7. Lighting of Our Models in Maya with Arnold Render
4.7.1. Lighting Set up
4.7.2. Model Lighting
4.7.3. Light and Color Mix
4.8. Going Deeper into Arnold: Denoising and the Different AOV's
4.8.1. AOV´s
4.8.2. Advanced Noise Treatment
4.8.3. Denoiser
4.9. Postproduction of Render in Photoshop
4.9.1. Image Treatment
4.9.2. Photoshop: Levels and Contrasts
4.9.3. Layers: Characteristics and Their Effects
Module 5. Hair Creation for Video Games and Movies
5.1. Differences Between Hair for Videogames and the Cinema
5.1.1. FiberMesh and Cards
5.1.2. Tools for the Creation of Hair
5.1.3. Hair Softwares
5.2. Hair Sculpting in Zbrush
5.2.1. Base Forms for Hairstyles
5.2.2. Creation of Zbrush Brushes in Zbrush for Hair
5.2.3. Curve Brushes
5.3. Hair Creation in Xgen
5.3.1. Xgen
5.3.2. Collections and Descriptions
5.3.3. Hair Vs. Grooming
5.4. Xgen Modifiers: Giving Realism to the Hair
5.4.1. Clumping
5.4.2. Coil
5.4.3. Hair Guidelines
5.5. Color and Region Maps: for Absolute Hair and Hair Control
5.5.1. Hair Region Maps
5.5.2. Cuts: Curly, Shaved and Long Hair
5.5.3. Micro Detail: Facial Hair
5.6. Xgen Advanced: Use of Expressions and Refinement
5.6.1. Expressions
5.6.2. Utilities
5.6.3. Hair Refinement
5.7. Placement of Cards in Maya for Videogame Modeling
5.7.1. Fibers in Cards
5.7.2. Cards by Hand
5.7.3. Cards and Real-time Motor
5.8. Optimization for Movies
5.8.1. Optimization for Hair and its Geometries
5.8.2. Preparation for Physics with Movements
5.8.3. Xgen Brushes
5.9. Hair Shading
5.9.1. Arnold’s Shader
5.9.2. Hyper-Realistic Look
5.9.3. Hair Treatment
5.10. Render
5.10.1. Render When Using Xgen
5.10.2. Lighting
5.10.3. Eliminating Noise
Module 6. Clothing Simulation
6.1. Importing Your Model into Marvelous Designer and Program Interface
6.1.1. Marvelous Designer
6.1.2. Software Functionality
6.1.3. Real-Time Simulations
6.2. Creation of Simple Patterns and Clothing Accessories
6.2.1. Creations: T-shirts, Accessories, Hats and Pockets
6.2.2. Fabric
6.2.3. Patterns, Zips and Seams
6.3. Creating Advanced Clothing: Complex Patterns
6.3.1. Pattern Complexity
6.3.2. Physical Qualities of Fabrics
6.3.3. Complex Accesories
6.4. Marvelous Clothing Simulation
6.4.1. Animated Models in Marvelous
6.4.2. Fabric Optimization
6.4.3. Model Preparation
6.5. Export of Clothing from Marvelous Designer to ZBrush
6.5.1. Low Poly in Maya
6.5.2. UV in Maya
6.5.3. Zbursh, Use of Reconstruct Subdiv
6.6. Refinement of Clothing
6.6.1. Workflow
6.6.2. Zbrush Details
6.6.3. Clothing Brushes in Zbrush
6.7. We Will Improve Our Simulation with ZBrush
6.7.1. From Tris to Quads
6.7.2. Maintenance of UV´s
6.7.3. Final Sculpting
6.8. High Detail Clothing Texturing in Mari
6.8.1. Tileable Textures and Fabric Materials
6.8.2. Baking
6.8.3. Texturing in Mari
6.9. Fabric Shading in Maya
6.9.1. Shading
6.9.2. Textures Created in Mari
6.9.3. Realism with Arnold’s Shaders
6.10. Render
6.10.1. Clothing Rendering
6.10.2. Lighting in Clothing
6.10.3. Texture Intensity
Module 7. Stylized Characters
7.1. Choice of a Stylized Character and Blocking of Base Forms
7.1.1. References and Concept Arts
7.1.2. Base Forms
7.1.3. Deformities and Fantastic Shapes
7.2. Conversion of Our Low Poly into High Poly Model: Head, Hair and Face Sculpting
7.2.1. Head Blocking
7.2.2. New Techniques to Create Hair
7.2.3. Making Improvements
7.3. Model Refinement: Hands and Feet
7.3.1. Advanced Sculpting
7.3.2. General Shape Refinement
7.3.3. Cleaning and Smoothing of Shapes
7.4. Creating the Jaw and Teeth
7.4.1. Creating Human Teeth
7.4.2. Increase Its Polygons
7.4.3. Fine Details in Zbrush Teeth
7.5. Modeling Clothing and Accessories
7.5.1. Cartoon Types of Clothing
7.5.2. Zmodeler
7.5.3. Applied Maya Modeling
7.6. Retopology and Clean Topology Creation from Scratch
7.6.1. Retopology
7.6.2. Loops According to the Model
7.6.3. Mesh Optimization
7.7. UV Mapping & Baking
7.7.1. UV's
7.7.2. Substance Painter: Baking
7.7.3. Polish Baking
7.8. Texturing & Painting In Substance Painter
7.8.1. Substance Painter: Texturing
7.8.2. Techniques of Handpainted Cartoon
7.8.3. Fill Layers with Generators and Masks
7.9. Lighting and Render
7.9.1. Lighting of Our Character
7.9.2. Color Theory and Presentation
7.9.3. Substance Painter: Render
7.10. Posing and Final Presentation
7.10.1. Diorama
7.10.2. Posing Techniques
7.10.3. Model Presentation
Module 8. Creature Modeling
8.1. Understanding Animal Anatomy
8.1.1. Study of Bones
8.1.2. Animal Head Proportions
8.1.3. Anatomic Differences
8.2. Skull Anatomy
8.2.1. Animal Face
8.2.2. Head Muscles
8.2.3. Skin Layer, Over Bones and Muscles
8.3. Anatomy of the Spine and Thoracic Cage
8.3.1. Animal Torso and Hip Musculature
8.3.2. Central Axis of the Body
8.3.3. Torso Creation in Different Animals
8.4. Animal Musculature
8.4.1. Muscles
8.4.2. Synergy Between Muscle and Bone
8.4.3. Shapes of an Animal Body
8.5. Reptiles and Amphibians
8.5.1. Reptilian Skin
8.5.2. Small Bones and Ligaments
8.5.3. Fine Detail
8.6. Mammals
8.6.1. Fur
8.6.2. Bigger and Stronger Bones and Ligaments
8.6.3. Fine Detail
8.7. Animals with Feathers
8.7.1. Plumage
8.7.2. Elastic and Light Bones and Ligaments
8.7.3. Fine Detail
8.8. Analysis of the Jaw and Creation of Teeth
8.8.1. Animal Specific Teeth
8.8.2. Detailing of Teeth
8.8.3. Teeth in the Jaw Cavity
8.9. Fur Creation for Animals
8.9.1. Xgen in Maya: Grooming
8.9.2. Xgen: Feathers
8.9.3. Render
8.10. Fantastic Animals
8.10.1. Fantastic Animal
8.10.2. Complete Animal Modeling
8.10.3. Texturing, Lighting and Rendering
Module 9. Blender: a New Twist in the Industry
9.1. Blender Vs. Zbrush
9.1.1. Advantages and Differences
9.1.2. Blender and the 3D Art Industry
9.1.3. Advantages and Disadvantages of Free Software
9.2. Blender Interface and Program Knowledge
9.2.1. Interface
9.2.2. Customization
9.2.3. Experimentation
9.3. Head Sculpting and Transpolation of Controls from ZBrush to Blender
9.3.1. Human Face
9.3.2. 3D Sculpting
9.3.3. Blender Brushes
9.4. Full Body Sculpting
9.4.1. Human Body
9.4.2. Advanced Techniques
9.4.3. Details and Refinement
9.5. Retopology and UV in Blender
9.5.1. Retopology
9.5.2. UV
9.5.3. Blender UDIM's
9.6. From Maya to Blender
9.6.1. Hard Surface
9.6.2. Modifiers
9.6.3. Keyboard Shortcuts
9.7. Blender Tips and Tricks
9.7.1. Range of Possibilities
9.7.2. Geometry Nodes
9.7.3. Workflow
9.8. Blender Nodes: Shading and Texture Placement
9.8.1. Nodal System
9.8.2. Shaders Through Nodes
9.8.3. Textures and Materials
9.9. Rendering in Blender with Cycles and Eevee
9.9.1. Cycles
9.9.2. Eevee
9.9.3. Lighting
9.10. Implementation of Blender in Our Workflow as Artists
9.10.1. Implementation in the Workflow
9.10.2. Search for Quality
9.10.3. Types of Exports
Module 10. Creation of Organic Environments in Unreal Engine
10.1. Configuration of Unreal Engine and Project Organization
10.1.1. Interface and Organization
10.1.2. Organization of Folders
10.1.3. Search for Ideas and References
10.2. Blocking an Environment in Unreal Engine
10.2.1. PST: Primary, Secondary and Tertiary Elements
10.2.2. Scene Design
10.2.3. Storytelling
10.3. Terrain Modeling: Unreal Engine and Maya
10.3.1. Unreal Terrain
10.3.2. Terrain Sculpting
10.3.3. Heightmaps: Maya
10.4. Modeling Techniques
10.4.1. Rocks Sculpting
10.4.2. Brushes for Rocks
10.4.3. Cliffs and Optimization
10.5. Creation of Vegetation
10.5.1. Speedtree Software
10.5.2. Low Poly Vegetation
10.5.3. Unreal’s Foliage System
10.6. Texturing in Substance Painter and Mari
10.6.1. Stylized Terrain
10.6.2. Hyper-Realistic Texturing
10.6.3. Tips and Guidelines
10.7. Photogrammetry
10.7.1. Megascan Library
10.7.2. Agisoft Metashape Software
10.7.3. Model Optimization
10.8. Shading and Materials in Unreal Engine
10.8.1. Texture Blending
10.8.2. Material Configuration
10.8.3. Final Touches
10.9. Lighting and Postproduction of Our Environment in Unreal Engine
10.9.1. Scene Look
10.9.2. Types of Lights and Atmospheres
10.9.3. Particles and Fog
10.10. Cinematic Render
10.10.1. Camera Techniques
10.10.2. Video and Screen Capture
10.10.3. Presentation and Final Finishing
Module 11. 3D Modeling with 3DS Max
11.1. 3D Modeling with 3DS Max
11.1.1. Orbit, Scopes and Views
11.1.2. Geometry Display Modes
11.1.3. Steering Wheels
11.2. Transformations and Geometry
11.2.1. Interactive and Parametric Transformations
11.2.2. Standard and Extended Primitives
11.2.3. Scaling Transformation
11.2.4. Select and Place / Select and Rotate
11.2.5. Alignment and Symmetry
11.3. Main Operations
11.3.1. Duplicate, Interactive Selection and Selection Groups and Elements
11.3.2. Layers, Grid, Snap y Pivot Point
11.3.3. Links, Coordinate Systems, Actions, Views and Isolate Geometry
11.4. Parametric Modifiers
11.4.1. Bend, Taper, Skew and Twist
11.4.2. Stretch and Squeeze
11.4.3. Ripple, Wave and Noise
11.4.4. Spherify, Lattice and Mirror
11.4.5. Push and Relax
11.4.6. Slice, Shell and Cap Holes
11.5. Free Deformation Modifiers
11.5.1. FFD Modifiers
11.5.2. FFD Cyl
11.5.3. FFD Box
11.6. Composition Objects
11.6.1. Boolean Operations Boolean and ProBoolean
11.6.2. Object Dispersion Scatter
11.6.3. Morphism Morph
11.7. 2D Shapes Splines
11.7.1. Splines and Its Options
11.7.2. The Vertex Line and Types
11.7.3. Sub-object Vertex, Segment and Splines
11.8. 2D Shapes Advanced Splines
11.8.1. Editable Spline and Use of Grid and Snap to Create 2D Shapes
11.8.2. Parametric Modifiers, FFD and Booleans with Splines
11.8.3. Extended Splines and Section
11.9. Spline Modifiers
11.9.1. Extrude
11.9.2. Bevel
11.9.3. Sweep
11.9.4. Lathe
11.10. Composition Objects Splines
11.10.1. Loft
11.10.2. Terrain
11.10.3. Sharpe Merge
Module 12. 3D Modeling with Advanced 3DS Max
12.1. Mesh Editing Polygonal Edition
12.1.1. Polygonal Edition Editable Poly and Edit Poly
12.1.2. Panels, Selection and Flexible Selection
12.1.3. TurboSmooth Modifier, MeshSmooth and HSDS
12.2. Mesh Editing Geometry
12.2.1. Vertex, Edge and Edge Editing
12.2.2. Polygon, Element and Geometry Editing
12.2.3. Geometry Cutting Planes and Added Resolution
12.3. Mesh Editing Selection Groups
12.3.1. Geometry Alignment and Visibility
12.3.2. Selection Sub-odjects, Material IDs and Smoothing Groups
12.3.3. Surface Subdivision and Vertex Painting
12.4. Mesh Editing Surface
12.4.1. Geometry Offset and Deformation Brush
12.4.2. Flat Mode and EditableMesh
12.4.3. Splines + Surface
12.5. Advanced Mesh Editing
12.5.1. EditablePatch
12.5.2. Model Sheet and Setup for Modeling
12.5.3. Symmetry Tracing and Symmetry
12.6. User Personalization
12.6.1. Display Floater and Panel Display Tool
12.6.2. Object Properties and Preferences
12.6.3. IU Personalization ShortCuts, Menus and Colors
12.6.4. Visor Configuration
12.7. Object Distribution
12.7.1. Spelling View
12.7.2. Spacing Tool and SnapShot
12.7.3. Cloning and Alignment Tool
12.7.4. Matrixes Array
12.8. Geometric Operations
12.8.1. Polygonal and Parametric Combination
12.8.2. Polygonal and Shape Combination
12.8.3. Polygonal and Boolean Combination
12.8.4. Polygonal, Spline, Parametric and Boolean Combining
12.9. Other Tools
12.9.1. Loops, Constraints and Edge Splitting
12.9.2. Isoline and Colapsar Modifiers
12.9.3. Polygon Counter and Optimization Types
12.10. Plugins and Scripts
12.10.1. Plugins and Scripts Grass-O-Matic
12.10.2. Creation of Grasses and Fibers with Grass-O-Matic
12.10.3. Greeble Plugin
12.10.4. Voronoi Script Fracture
Module 13. 3D Modeling with Graphite Tool
13.1. Interface
13.1.1. Functionality
13.1.2. Enable the Tool
13.1.3. Interface
13.2. Sub-objects and Selection
13.2.1. Sub-objects
13.2.2. Modify Topology
13.2.3. Modify Selection
13.3. Editing
13.3.1. Swift Loop
13.3.2. Paint Connect
13.3.3. Constraints
13.4. Geometry
13.4.1. Relax
13.4.2. Attach and Detach
13.4.3. Create and Collapse
13.4.4. Quadrify and Slice
13.5. Tools Similar to Polygon Mode
13.5.1. Polygons
13.5.2. Loops
13.5.3. Tris
13.5.4. Subdivision
13.5.5. Visibility
13.5.6. Align
13.5.7. Smoothing and Hardening
13.6. PolyDraw 1
13.6.1. Drag and Conform
13.6.2. Step Build Over the Grid
13.6.3. Step Build Over a Surface
13.7. PolyDraw 2
13.7.1. Shapes and Topology
13.7.2. Splines and Strips
13.7.3. Surface and Branches
13.8. Paint Deform
13.8.1. Shift Brush and Its Options
13.8.2. Push/Pull Brush and Its Options
13.8.3. Mirror and Other Options
13.9. Selection
13.9.1. Closed and Open Selections and Saving Selections
13.9.2. Select by Surfaces, Normals, Perspective or Random Parameters
13.9.3. Select by Vertex, Distance, Symmetry or Color
13.10. Painting with Objects
13.10.1. Object Catalogue
13.10.2. Brush Options
13.10.3. Functionality
Module 14. 3D Modeling with ZBrush
14.1. ZBrush
14.1.1. Interface and Basic Controls
14.1.2. Subtools, Symmetry, Transpose and Deformation
14.1.3. Brushes and Alphas
14.2. Main Tools
14.2.1. Masks and Polygroups
14.2.2. Subdivisions, Dynamesh and ZRemesher
14.2.3. Modify Topology, Matcaps and BPR
14.3. Modification Tools
14.3.1. Insert Multi Mesh
14.3.2. Layers and Morph Target
14.3.3. Projections and Extract
14.4. Advanced Tools
14.4.1. Crease and Bevel
14.4.2. Surface and Shadowbox
14.4.3. Decimation Master
14.5. ZSpheres and Adaptive Skin
14.5.1. Zspheres Controls
14.5.2. ZSketch
14.5.3. Adaptive Skin
14.6. Dynamesh and Advanced Zremesher
14.6.1. Boolean
14.6.2. Brushes
14.6.3. Zremesher Using Guides
14.7. Curve Brushes
14.7.1. Controls and Modifiers
14.7.2. Curve Surface and Other Brushes
14.7.3. Brush Creation with Curve
14.8. Hard Surface
14.8.1. Segments with Masks
14.8.2. Polygroupit
14.8.3. Panel loops
14.8.4. ZModeler
14.8.5. Primitives
14.9. Modifiers
14.9.1. Extender and Multi Slice
14.9.2. Deformer and Blend Twist
14.9.3. Taper and Flatten
14.9.4. Bend Arc and Bend Curve
14.10. Transpose Master
14.10.1. Posing a Character with Transpose Master
14.10.2. Correct Details
14.10.3. Prepare Character for Rendering
Module 15. Texturing
15.1. Texturing
15.1.1. Baking
15.1.2. PBR Physycally Based Rendering
15.1.3. Basic and Compound Texturing
15.1.4. Tileable Textures
15.2. Mapping Coordinates University of Valencia
15.2.1. Unwrap and Seams
15.2.2. UVWs Editor
15.2.3. Editor Options
15.3. Object ID
15.3.1. ID Assignment and Functionality
15.3.2. Multisubject Material
15.3.3. Application of Materials as Instances
15.4. High Poly and Baking of Normals in 3DS Max
15.4.1. High Poly and Low Poly
15.4.2. Projection Settings for Normal Map Baking
15.4.3. Normal MapTexture Baking
15.4.4. Normal MapSettings
15.5. Other Material Baking in 3DS Max
15.5.1. Fuzzy Map Application and Baking
15.5.2. Compound Materials
15.5.3. Mask Settings
15.6. Retopology in 3DS Max
15.6.1. Retopology Tools
15.6.2. Retopology with Graphite Tool
15.6.3. Retopology Settings
15.7. Texturing with 3DS Max
15.7.1. Material Properties
15.7.2. Texture Baking
15.7.3. Textural Toasting Complete Map, Normal Map and AO Map
15.8. Texturing with Photoshop
15.8.1. Coordinate Template
15.8.2. Adding Details in Photoshop and Reimporting Template with Textures
15.8.3. Tile a Texture
15.8.4. Create Normal Map
15.9. Coordinates and Maping with ZBrush
15.9.1. UV Master
15.9.2. Control Painting
15.9.3. Unwrap and Flatten
15.10. Texturing with ZBrush
15.10.1. Paint Mode
15.10.2. Noise Maker
15.10.3. Image Projection
Module 16. Texturing with Substance Painter
16.1. Substance Painter
16.1.1. Create New Projects and Reimport Models
16.1.2. Basic Controls and Interface 2D and 3D Views
16.1.3. Bakes
16.2. Baking Layers
16.2.1. World Space Normal
16.2.2. Ambient Occlusion
16.2.3. Curvature
16.2.4. Position
16.2.5. ID, Normal, Thickness
16.3. Layers
16.3.1. Base Color
16.3.2. Roughness
16.3.3. Metallic
16.3.4. Material
16.4. Masks and Generators
16.4.1. Layers and UVs
16.4.2. Masks
16.4.3. Procedural Generators
16.5. Material Base
16.5.1. Types of Materials
16.5.2. Customized Generators
16.5.3. Creation of a Base Material from Scratch
16.6. Brushes
16.6.1. Predefined Parameters and Brushes
16.6.2. Alphas, Lazy Mouseand Symmetry
16.6.3. Create Customized Brushes and Save Them
16.7. Particles
16.7.1. Particle Brushes
16.7.2. Properties of Particles
16.7.3. Particles Using Masks
16.8. Projections
16.8.1. Prepare Textures
16.8.2. Stencil
16.8.3. Cloning
16.9. Substance Share/Source
16.9.1. Substance Share
16.9.2. Substance Source
16.9.3. Textures.com
16.10. Terminology
16.10.1. Normal Map
16.10.2. Padding or Bleed
16.10.3. Mipmapping
Module 17. Rendering
17.1. Marmoset Toolbag
17.1.1. Geometry Preparation and FBX Format
17.1.2. Basic Concepts Importance of Geometry
17.1.3. Links and Materials
17.2. Marmoset Toolbag Sky
17.2.1. Environment
17.2.2. Light Poitns
17.2.3. Lights Outside the Sky
17.3. Marmoset Toolbag Details
17.3.1. Shadow and Pose
17.3.2. Procedural Materials
17.3.3. Channels and Reflection
17.4. Real-Time Rendering with Marmoset Toolbag
17.4.1. Image Export with Transparency
17.4.2. Interactive Export Marmoset Viewer
17.4.3. Film Export
17.5. Marmoset Toolbag Animated Cameras
17.5.1. Model Preparation
17.5.2. Camera
17.5.3. Main Camera Interactive Animation
17.6. Marmoset Toolbag Advanced Animated Cameras
17.6.1. Add New Cameras
17.6.2. Parametric Animation
17.6.3. Final Details
17.7. Marmoset Toolbag 4. Raytrace
17.7.1. Subsurface
17.7.2. Ray Tracing
17.7.3. Add Cameras and Map Rendering
17.8. Rendering with Substance Painter IRay
17.8.1. Iray Configuration
17.8.2. Viewer Settings
17.8.3. Display Settings
17.9. Rendering with ZBrush
17.9.1. Material Configuration
17.9.2. BPR Render and Lights
17.9.3. BPR Masks and Final Rendering in Photoshop
17.10. Rendering with Keyshot
17.10.1. From Zbrush to Keyshot
17.10.2. Materials and Lighting
17.10.3. Composition in Photoshop and Final Image
Module 18. Rendering with VRay Engine in 3DS Max
18.1. VRay Render Engine Assignment
18.1.1. Preparation of the Render Space
18.1.2. Render Setup Options and Assign Render
18.1.3. Optimize Render time
18.2. Lighting and Light Creation
18.2.1. 3-Point Lighting
18.2.2. Light Configuration
18.2.3. Render Region
18.3. Creation and Application of Materials
18.3.1. Vray Materials
18.3.2. VRay Material Configuration
18.3.3. Self-Illumination
18.4. From Substance Painter to VRay
18.4.1. Connect Nodes and Material Settings
18.4.2. Export Presets
18.4.3. Configure Smart Material in VRay
18.5. Details and Positioning in the Scene
18.5.1. Applying Shadows According to Model Position
18.5.2. Adjust Model and Silhouette
18.5.3. Metalic Base
18.6. Rounding Surfaces
18.6.1. VRayEdgeTex
18.6.2. Functionality and Configuration
18.6.3. Rendering with and without Rounding
18.7. Field of Vision
18.7.1. Camera and Shot
18.7.2. Camera Opening
18.7.3. Field of Vision
18.8. Ambient Occlusion and Global Illumination
18.8.1. GI and Render Elements
18.8.2. VRayExtraTex and VrayDirt
18.8.3. Global Illumination Multiplier
18.9. Rendering of a Still Frame
18.9.1. Adjust Render Values
18.9.2. Save Final Rendering
18.9.3. Composition of Ambient Occlusion
18.10. Rendering of a Sequence
18.10.1. Camera Animation
18.10.2. Rendering Options for Sequence
18.10.3. Frame Assembly for the Sequence
Module 19. Characters
19.1. Types of Characters
19.1.1. Realistic and Cartoon/Stylized
19.1.2. Humanoids and Creatures
19.1.3. Anatomy and Proportions
19.2. Tips to Work with ZBrush
19.2.1. Work with Reference and Transparencies Fitting and Transformation from 2D to 3D
19.2.2. Joining Parts with Dynamesh Working in Pieces or in Conjunction with Polygroups and ZRemesher
19.2.3. Lazy Mouse and GoZ
19.3. Sculpting a Head in ZBrush
19.3.1. Primary Shapes and Proportions
19.3.2. Eyelids and Eyes
19.3.3. Nose, Ears and Lips
19.3.4. ZRemesher for a Head
19.3.5. Eyebrows and Eyelashes
19.3.6. Details and Refinement
19.4. Clothing
19.4.1. Clothes
19.4.2. Armor
19.4.3. Modeled Detail and with Noise Maker
19.5. Tips for Modeling
19.5.1. Hands
19.5.2. Styled Hair
19.5.3. Extra Details with Alphas
19.6. Tips for Modeling Types of Materials
19.6.1. Feathers
19.6.2. Rocks and Minerals
19.6.3. Scales
19.7. Hair with ZBrush
19.7.1. Curve Brushes
19.7.2. Long Hair with Curve Brush
19.7.3. Short Hair or Animal Hair
19.8. Hair with Xgen
19.8.1. References and Tool Preparation
19.8.2. Application of Modifiers and Tools in Depth
19.8.3. Lighting and Rendering
19.9. Posing with Transpose Master
19.9.1. TPoseMesh Working with Smooth Masks, Move and Rotate
19.9.2. The Importance of the Silhouette
19.9.3. TPose SubTool Correct and Finish Detailing
19.10. Character Props and Environment
19.10.1. Accessories and Weapons: Elements that Speak of the Character's History
19.10.2. Environment and Background Elements Enhance the Character
19.10.3. Own Lighting for the Character
Module 20. Export to Unreal
20.1. Unreal Engine
20.1.1. Game Exporter
20.1.2. Create New Projects and Controls
20.1.3. Import Models to Unreal
20.2. Basic Material Properties
20.2.1. Create Materials and Nodes
20.2.2. Constant and Its Values
20.2.3. Texture Sample
20.3. Common Material Nodes
20.3.1. Multiply
20.3.2. Texture Coordinate
20.3.3. Add
20.3.4. Fresnel
20.3.5. Panner
20.4. Materials and Bloom
20.4.1. Linear Interpolate
20.4.2. Power
20.4.3. Clamp
20.5. Textures to Modify Material
20.5.1. Masks
20.5.2. Transparent Materials
20.5.3. Color Match
20.6. Basic Lighting
20.6.1. Light Source
20.6.2. Skylight
20.6.3. Fog
20.7. Fill and Creative Lighting
20.7.1. Point Light
20.7.2. Spot Light and Rect Light
20.7.3. Objects as Light Sources
20.8. Night Lighting
20.8.1. Light Source Properties
20.8.2. Fog Properties
20.8.3. Skylight Properties
20.9. Lightmaps
20.9.1. Viewer Modes Lightmap Density
20.9.2. Improve Lightmaps Resolution
20.9.3. Lightmass Importance Volume
20.10. Rendering
20.10.1. Cameras and Their Properties
20.10.2. Basic Post-processing
20.10.3. High Resolution Screenshot
Module 21. Study of Figure and Shape
21.1. Geometric Figure
21.1.1. Types of Geometric Figures
21.1.2. Basic Geometric Constructions
21.1.3. Geometric Transformations in the Plane
21.2. Polygons
21.2.1. Triangles
21.2.2. Quadrilaterals
21.2.3. Regular Polygons
21.3. Axonometric System
21.3.1. System Fundamentals
21.3.2. Types of Orthogonal Axonometry
21.3.3. Sketch
21.4. Three-Dimensional Drawing
21.4.1. Perspective and Third Dimension
21.4.2. Essential Elements of Drawing
21.4.3. Perspectives
21.5. Technical Drawing
21.5.1. Basic Notions
21.5.2. View Disposition
21.5.3. Cuts
21.6. Fundamentals of Mechanical Elements I
21.6.1. Axes
21.6.2. Joints and Bolts
21.6.3. Springs
21.7. Fundamentals of Mechanical Elements II
21.7.1. Bearings
21.7.2. Gears
21.7.3. Flexible Mechanical Elements
21.8. Symmetry Laws
21.8.1. Translation, Rotation, Reflection, Extension
21.8.2. Touching, Overlapping, Subtraction, Intersection, Joining
21.8.3. Combined Laws
21.9. Shape Analysis
21.9.1. The Shape Function
21.9.2. The Mechanical Shape
21.9.3. Types of Shapes
21.10. Topological Analysis
21.10.1. Morphogenesis
21.10.2. Composition
21.10.3. Morphology and Topology
Module 22. Hard Surface Modeling
22.1. Hard Surface Modeling
22.1.1. Topology Control
22.1.2. Function Communication
22.1.3. Speed and Efficiency
22.2. Hard Surface I
22.2.1. Hard Surface
22.2.2. Development
22.2.3. Structure
22.3. Hard Surface II
22.3.1. Applications
22.3.2. Physical Industry
22.3.3. Virtual Industry
22.4. Types of Modeling
22.4.1. Technical Modeling /Nurbs
22.4.2. Polygonal Modeling
22.4.3. Sculp Modeling
22.5. Deep Hard Surface Modeling
22.5.1. Profiles
22.5.2. Topology and Edge Flow
22.5.3. Mesh Resolution
22.6. Nurbs Modeling
22.6.1. Points, Lines, Polylines, Curves
22.6.2. Surfaces
22.6.3. 3D Geometry
22.7. Basics of Polygonal Modeling
22.7.1. Edit Poly
22.7.2. Vertices, Edges, Polygons
22.7.3. Surgery
22.8. Basics of Sculpting Modeling
22.8.1. Basic Geometry
22.8.2. Subdivisions
22.8.3. Deformers
22.9. Topology and Retopology
22.9.1. High Poly and Low poly
22.9.2. Polygonal Counting
22.9.3. Bake Maps
22.10. UV Maps
22.10.1. UV Coordinates
22.10.2. Techniques and Strategies
22.10.3. Unwrapping
Module 23. Technical Modeling in Rhino
23.1. Rhino Modeling
23.1.1. Rhino Interface
23.1.2. Types of Objects
23.1.3. Navigating the Model
23.2. Fundamental Notions
23.2.1. Editing with Gumball
23.2.2. Viewports
23.2.3. Modeling Assistants
23.3. Precision Modeling
23.3.1. Input by Coordinates
23.3.2. Distance and Angle Restriction Input
23.3.3. Restriction to Objects
23.4. Command Analysis
23.4.1. Additional Modeling Assistants
23.4.2. SmartTrack
23.4.3. Construction Plans
23.5. Lines and Polylines
23.5.1. Circles
23.5.2. Free-form Lines
23.5.3. Helix and Spiral
23.6. Geometry Editing
23.6.1. Fillet and Chanfer
23.6.2. Mixing Curves
23.6.3. Loft
23.7. Transformations I
23.7.1. Move, Rotate, Scale
23.7.2. Join, Prune, Spread
23.7.3. Separate, Offset, Formations
23.8. Creating Shapes
23.8.1. Deformable Shapes
23.8.2. Modeling with Solids
23.8.3. Solids Transformation
23.9. Creating Surfaces
23.9.1. Simple Surfaces
23.9.2. Extrusion, Lofting and Surface Revolution
23.9.3. Surface Sweeping
23.10. Organisation
23.10.1. Layers
23.10.2. Groups
23.10.3. Blocks
Module 24. Modeling Techniques and Their Application in Rhino
24.1. Techniques
24.1.1. Intersection for a Support
24.1.2. Creation of a Space Helmet
24.1.3. Pipes
24.2. Application I
24.2.1. Create a Car Rim
24.2.2. Create a Tire
24.2.3. Modeling a Clock
24.3. Basic Techniques II
24.3.1. Use of Isocurves and Edges for Modeling
24.3.2. Make Openings in Geometry
24.3.3. Working with Hinges
24.4. Application II
24.4.1. Creation of a Turbine
24.4.2. Construct Air Inlets
24.4.3. Tips for Imitating Edge Thickness
24.5. Tools
24.5.1. Tips for Using Mirror Symmetry
24.5.2. Use of Fillets
24.5.3. Use of Trims
24.6. Mechanical Application
24.6.1. Creating Gears
24.6.2. Building a Pulley
24.6.3. Building a Shock Absorber
24.7. Importing and Exporting Files
24.7.1. Send Rhino Files
24.7.2. Export Rhino Files
24.7.3. Import Rhino Files from Ilustrator
24.8. Analysis Tools I
24.8.1. Graphical Curvature Analysis Tool
24.8.2. Curve Continuity Analysis
24.8.3. Problems and Solutions of Curve Analysis
24.9. Analysis Tools II
24.9.1. Surface Direction Analysis Tool
24.9.2. Surface Analysis Tool Environment Map
24.9.3. Analysis Tool Show Edges
24.10. Strategies
24.10.1. Construction Strategies
24.10.2. Area Per Network of Curves
24.10.3. Work with Blueprints
Module 25. Advanced Modeling in Rhino
25.1. Modeling a Motorbike
25.1.1. Importing Reference Images
25.1.2. Modeling a Rear Tire
25.1.3. Modeling Rear Car Rim
25.2. Mechanical Components Rear Axle
25.2.1. Creating the Brake System
25.2.2. Building the Transmission Chain
25.2.3. Modeling the Chain Cover
25.3. Modeling the Motor
25.3.1. Creating the Body
25.3.2. Adding Mechanical Elements
25.3.3. Incorporating Technical Details
25.4. Modeling of the Main Roof
25.4.1. Modeling Curves and Surfaces
25.4.2. Modeling of the Roof
25.4.3. Cutting the Frame
25.5. Modeling the Upper Zone
25.5.1. Building the Seat
25.5.2. Creating Details for the Front Area
25.5.3. Creating Details for the Rear Area
25.6. Functional Parts
25.6.1. Gasoline Tank
25.6.2. Rear Lights
25.6.3. Front Lights
25.7. Building Front Axle I
25.7.1. Break and Rim System
25.7.2. The Fork
25.7.3. The Handlebars
25.8. Building Front Axle II
25.8.1. Handles
25.8.2. Break Cables
25.8.3. Instruments
25.9. Adding Details
25.9.1. Refined Main Body
25.9.2. Adding Silencer
25.9.3. Incorporating Pedals
25.10. Final Elements
25.10.1. Modeling the Windshield
25.10.2. Modeling the Support
25.10.3. Final Details
Module 26. Polygonal Modeling in 3D Studio Max
26.1. Modeling with References
26.1.1. Creation of Reference Images
26.1.2. Smoothing Hard Surfaces
26.1.3. Scene Organization
26.2. High-Resolution Meshes
26.2.1. Basic Smoothing Modeling and Smoothing Groups
26.2.2. Modeling with Extrusions and Bevels
26.2.3. Using the Modifier Turbosmooth
26.3. Modeling with Splines
26.3.1. Modifying Curvatures
26.3.2. Configuring the Faces of the Polygons
26.3.3. Extruding and Spheronizing
26.4. Creating Complex Shapes
26.4.1. Configurating Components and Work Grid
26.4.2. Duplicating and Soldering Components
26.4.3. Cleaning Polygons and Smoothing
26.5. Modeling with Edge Cuts
26.5.1. Creation and Positioning of the Template
26.5.2. Making Cuts and Cleaning Topology
26.5.3. Extruding Shapes and Creating Folds
26.6. Modeling from the Model Low Poly
26.6.1. Starting with the Basic Shape and Adding Chamfers
26.6.2. Adding Subdivisions and Generating Edges
26.6.3. Cuts, Welds and Details
26.7. Edit Poly Modifer I
26.7.1. Work Flow
26.7.2. Interface
26.7.3. Sub Objects
26.8. Creation of Compound Objects
26.8.1. Morph, Scatter, Conform and Connect Compound Objects
26.8.2. BlobMesh, ShapeMerge and Boolean Compound Objects
26.8.3. Loft, Mesher and Proboolean Compound Objects
26.9. Techniques and Strategies to Create UVs
26.9.1. Simple Geometries and Arc Geometries
26.9.2. Hard Surfaces
26.9.3. Examples and Applications
Module 27. Advanced Polygonal Modeling in 3D Studio MAX
27.1. Modeling a Sci-FI Spacecraft
27.1.1. Creating Our Work Space
27.1.2. Starting with the Main Body
27.1.3. Configuration of Wings
27.2. The Cabin
27.2.1. Development of the Cabin Area
27.2.2. Modeling the Control Panel
27.2.3. Adding Details
27.3. The Fuselage
27.3.1. Defining Components
27.3.2. Adjusting Minor Components
27.3.3. Development of the Panel Under the Body
27.4. The wings
27.4.1. Creation of Main Wings
27.4.2. Incorporation of the Tail
27.4.3. Adding Wing Inserts
27.5. Main Body
27.5.1. Separation of Parts into Components
27.5.2. Creating Additional Panels
27.5.3. Incorporating Dock Doors
27.6. Motors
27.6.1. Creating Space for the Motors
27.6.2. Constructing Turbines
27.6.3. Adding Exhausts
27.7. Incorporating Details
27.7.1. Lateral Components
27.7.2. Characteristic Components
27.7.3. Refining General Components
27.8. Bonus I - Creation of the Pilot's Helmet
27.8.1. Head Block
27.8.2. Refining Details
27.8.3. Modeling the Helmet Neck
27.9. Bonus II - Creation of the Pilot's Helmet
27.9.1. Refinements of the Helmet Neck
27.9.2. Steps for Final Details
27.9.3. Mesh Completion
27.10. Bonus III - Creation of a Co-Pilot Robot
27.10.1. Shape Development
27.10.2. Adding Details
27.10.3. Supporting Edges for Subdivision
Module 28. Low Poly Modeling in 3D Studio MAX
28.1. Heavy Machinery Vehicle Modeling
28.1.1. Creation of the Volumetric Model
28.1.2. Volumetric Modeling of Tracks
28.1.3. Volumetric Construction of the Shovel
28.2. Incorporating Different Components
28.2.1. Cabin Volumetry
28.2.2. Volumetry of Mechanical Arm
28.2.3. Mechanical Shovel Blade Volumetry
28.3. Adding Subcomponents
28.3.1. Creating Shovel Teeth
28.3.2. Adding the Hydraulic Piston
28.3.3. Connecting Subcomponents
28.4. Incorporating Details into Volumetries I
28.4.1. Creating Caterpillars from Tracks
28.4.2. Incorporating Track Bearings
28.4.3. Defining the Track Housing
28.5. Incorporating Details to Volumetries II
28.5.1. Chassis Subcomponents
28.5.2. Bearing Covers
28.5.3. Adding Piece Cuts
28.6. Incorporating Details to Volumetries III
28.6.1. Creating Radiators
28.6.2. Adding the Hydraulic Arm Base
28.6.3. Creating the Exhaust Pipes
28.7. Incorporating Details to Volumetries IV
28.7.1. Creating the Cabin Protective Grill
28.7.2. Adding Pipes
28.7.3. Adding Nuts, Bolts and Rivets
28.8. Developing the Hydraulic Arm
28.8.1. Creating Supports
28.8.2. Retainers, Washers, Screws and Connections
28.8.3. Creation of the Head
28.9. Developing the Cabin
28.9.1. Defining the Casing
28.9.2. Adding Windshields
28.9.3. Latch and Headlight Details
28.10. Mechanical Development of the Excavator
28.10.1. Creating the Body and Teeth
28.10.2. Creation of the Toothed Roller
28.10.3. Wiring with Splines, Connectors and Fasteners
This program will allow you to work in the best videogame companies in the world, modeling the characters and landscapes of upcoming blockbuster titles"
Advanced Master's Degree in Integral 3D Modeling
.
3D modeling is a discipline widely demanded by studios dedicated to film animation and video game development, where tools and work techniques that allow the dynamization of their projects are handled. Being an area in constant growth and transformation, TECH Global University developed an Advanced Master's Degree in Integral 3D Modeling, focused on the mastery of software present in this productive market. The program has a 100% online mode of study, with innovative classes taught by a team of specialists with extensive experience. Over the course of two years, you will learn everything related to the field, including the handling of retopology, Maya Modeling, Uvs and texturing with Allegorithmic Substance Painter and Mari, as well as rendering, lighting and model posing. In addition, you will study the different techniques of professional and hyper realistic sculpting and the types of 3D modeling: organic, Hard Surface, Graphite Tool, ZBrush, 3DS Max and texturing.
Meet the integral 3D model
.
Would you like to work in the video game industry or in major film productions? Thanks to the innovative techniques that TECH's postgraduate program offers you, you will be able to achieve it. The contents of this Advanced Master's Degree were carefully elaborated by great experts, who will instruct you in advanced modeling in Rhino and the preparation of UV-systems UDIM focused on models of large productions, as well as the use of ZBrush, Substance Painter, Blender, Unreal or Marmoset Toolbag. In addition, you will delve into human and animal anatomy to elaborate hyper-realistic creatures, the development of textures and FX of 3D models and the types of programs focused on modeling or texturing.
Dare to become an expert in integral 3D modeling
.
To take this program you will only need a device with internet access, without having to make transfers from one place to another and without establishing fixed study schedules, allowing you to self-manage your learning spaces as best suits you. Through this program, designed with a unique educational model of its kind, you will learn the development of UV maps, the basics of three-dimensional geometry and the creation of stylized characters, their hair, clothing and positions. Because of the above, you will manage to design all kinds of modeling, landscapes, figures and textures through the best techniques.