University certificate
The world's largest faculty of information technology”
Why study at TECH?
An Advanced master’s degree in Integral 3D Modeling 100% online with 3,000 teaching hours of quality learning”
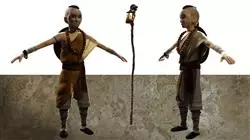
In an increasingly digital world, 3D Modeling has become a fundamental skill for any IT professional who wants to excel in the field of design. A creative process that allows the creation of objects and characters in three dimensions, offering more realistic and attractive productions for the public. A technique that is widely used in film production, advertising, video games, architecture or engineering.
In this scenario, computer scientists have a wide range of possibilities to grow in various sectors of great relevance before them. To promote this goal, TECH provides this Advanced master’s degree in Integral 3D Modeling in a 100% online educational format and only 24 months long.
A program with a theoretical-practical approach, which will take students to delve into the key areas of organic modeling, texture modeling and hardsurface modeling. To do this, graduates will delve into the use of tools such as ZBrush, Substance Painter, Blender, 3DS Max, Unreal and Marmoset Toolbag. Likewise, students will have the opportunity to investigate specific topics, such as texturing with Allegorithmic Substance Painter and Mari, 3D modeling with Graphite Tool and UV preparation for UDIM systems focused on large production models.
All of the above with a system that allows the graduate to reduce the long hours study and memorization. With Relearning method, based on repetition of key content, the graduate will consolidate the main concepts in an agile way.
An excellent educational option for those who wish to improve in 3D Modeling and boost their career path through flexible teaching. The graduate only needs a digital device with an Internet connection to view the content of this avant-garde program at any time.
Get ready to become a comprehensive expert in 3D Modeling, using the latest techniques and tools in the industry”
This Advanced master’s degree in Integral 3D Modeling contains the most complete and up-to-date program on the market. The most important features include:
- The development of practical cases presented by experts in 3D Modeling
- The graphic, schematic, and practical contents with which they are created, thatprovide scientific and practical information on the disciplines that are essential for professional practice
- Practical exercises where the self-assessment process can be carried outto improve learning
- Special emphasis on innovative methodologies in 3D Modeling
- Theoretical lessons, questions for experts, discussion forums on controversial issuesand individual reflection work
- Content that is accessible from any fixed or portable device with an Internet connection
Develop your skills in organic, texture and hardsurface modeling with ZBrush, Substance Painter, Blender, 3DS Max, Unreal and Marmoset Toolbag”
Its teaching staff includes professionals belonging to the field of 3D Modeling, who pour the experience of their work into this program as well as recognized specialists from leading societies and prestigious universities.
The multimedia content, developed with the latest educational technology, will provide the professional with situated and contextual learning, i.e., a simulated environment that will provide an immersive learning experience designed to prepare for real-life situations.
This program is designed around Problem-Based Learning, whereby the student must try to solve the different professional practice situations that arise throughout the program. For this purpose, the professional will be assisted by an innovative system of interactive videos made by renowned experts.
Make the most of the flexibility and comfort of studying 100% online, adapting your studies to your pace and personal needs"
Apply this program’s teachings in projects from various sectors, from television, design to engineering"
Syllabus
The study plan of this Advanced master’s degree has been meticulously prepared by highly prestigious experts In this way, students have the assurance of accessing the best knowledge in the field of 3D Modeling, since the program incorporates the latest developments in areas such as the principles of hardsurface, modeling, advanced modeling in Rhino, Retopology and modeling in Maya, or UV preparation for UDIM systems focused on large production models, among others.
A complete program, accessible 24 hours a day from a laptop with an Internet connection”
Module 1. Anatomy
1.1. General Skeletal Masses, Proportions
1.1.1. Bones
1.1.2. The Human Face
1.1.3. Anatomical Canons
1.2. Anatomical Differences between Genders and Sizes
1.2.1. Shapes Applied to Characters
1.2.2. Curves and Straight Lines
1.2.3. Behavior of Bones, Muscles and Skin
1.3. The Head
1.3.1. The Skull
1.3.2. Muscles of the Head
1.3.3. Layers: Skin, Bone and Muscle Facial Expressions
1.4. The Torso
1.4.1. Torso Musculature
1.4.2. Central Axis of the Body
1.4.3. Different Torsos
1.5. The Arms
1.5.1. Joints: Shoulder, Elbow and Wrist
1.5.2. Arm Muscle Behavior
1.5.3. Detail of the Skin
1.6. Hand Sculpting
1.6.1. Hand Bones
1.6.2. Hand Muscles and Tendons
1.6.3. Hand Skin and Wrinkles
1.7. Leg Sculpting
1.7.1. Joints: Hip, Knee and Ankle
1.7.2. Muscles of the Leg
1.7.3. Skin Details
1.8. The Feet
1.8.1. Bone Construction for the Foot
1.8.2. Foot Muscles and Tendons
1.8.3. Foot Skin and Wrinkles
1.9. Whole Human Figure Composition
1.9.1. Complete Creation of a Human Base
1.9.2. Joint and Muscle Attachment
1.9.3. Skin Composition, Pores and Wrinkles
1.10. Complete Human Model
1.10.1. Model Polishing
1.10.2. Hyper Skin Detail
1.10.3. Composition
Module 2. Retopology and Maya Modeling
2.1. Advanced Facial Retopology
2.1.1. Importing into Maya and the Use of Quad Draw
2.1.2. Retopology of the Human Face
2.1.3. Loops
2.2. Human Body Retopology
2.2.1. Creation of Loops in the Joints
2.2.2. Ngons and Tris and When to Use Them
2.2.3. Topology Refinement
2.3. Retopology of Hands and Feet
2.3.1. Movement of Small Joints
2.3.2. Loops and Support Edges to Improve the Base Mesh of Feet and Hands
2.3.3. Difference of Loops for Different Hands and Feet
2.4. Differences Between Maya Modeling vs. ZBrush Sculpting
2.4.1. Different Workflows for Modeling
2.4.2. Low Poly Base Model
2.4.3. High Poly Model
2.5. Creation of a Human Model from Scratch in Maya
2.5.1. Human Model Starting From the Hip
2.5.2. General Base Form
2.5.3. Hands and Feet and their Topology
2.6. Transformation ofLow poly en High Poly
2.6.1. Zbrush
2.6.2. High Poly: Differences Between Divide and Dynamesh
2.6.3. Sculpting Form: Alternation Between Low Poly and High Poly
2.7. Application of Details in ZBrush: Pores, Capillaries, etc.
2.7.1. Alphas and Different Brushes
2.7.2. Detail: Dam-Standard Brush
2.7.3. Projections and Surfaces in ZBrush
2.8. Advanced Eye Creation in Maya
2.8.1. Creation of the Spheres: Sclera, Cornea and Iris
2.8.2. Lattice Tool
2.8.3. Displacement Map from ZBrush
2.9. Use of Deformers in Maya
2.9.1. Maya Deformers
2.9.2. Topology Movement: Polish
2.9.3. Polishing of the Final Mesh
2.10. Creation of Final Uv's and Application of Displacement Mapping
2.10.1. Character Uv's and Importance of Sizes
2.10.2. Texturing
2.10.3. Displacement Map
Module 3. UVs and Texturing with Allegorithmic Substance Painter and Mari
3.1. Creation of High-Level UVs in Maya
3.1.1. Facial UVs
3.1.2. Creation and Layout
3.1.3. Advanced UV´s
3.2. UV Preparation for UDIM Systems Focused on High Throughput Models
3.2.1. UDIM
3.2.2. UDIM in Maya
3.2.3. Textures in 4K
3.3. XYZ Textures: What They Are and How to Use Them
3.3.1. XYZ. Hyperrealism
3.3.2. MultiChannel Maps
3.3.3. Texture Maps
3.4. Texturing: Video Games and Film
3.4.1. Substance Painter
3.4.2. Mari
3.4.3. Types of Texturing
3.5. Texturing in Substance Painter for Videogames
3.5.1. Baking from High to Low Poly
3.5.2. PBR Textures and Their Importance
3.5.3. ZBrush with Substance Painter
3.6. Finalizing our Substance Painter Textures
3.6.1. Scattering, Translucency
3.6.2. Model Texturing
3.6.3. Scars, Freckles, Tattoos, Paints or Makeup
3.7. Hyper-Realistic Facial Texturing with XYZ Textures and Color Mapping
3.7.1. XYZ Textures in ZBrush
3.7.2. Wrap
3.7.3. Correction of Errors
3.8. Hyper-Realistic Facial Texturing with XYZ Textures and Color Mapping
3.8.1. Mari's Interface
3.8.2. Texturing in Mari
3.8.3. Projection of Skin Textures
3.9. Advanced Detailing of Displacements Maps in Zbrush and Mari
3.9.1. Texture Painting
3.9.2. Displacement for Hyperrealism
3.9.3. Creation of Layers
3.10. Shading and Texture Implementation in Maya
3.10.1. Skin Shaders in Arnold
3.10.2. Hyper-realistic Eye
3.10.3. Touch-ups and Tips
Module 4. Rendering, Lighting and Posing of Models
4.1. Characters Posing in ZBrush
4.1.1. Rig in zbrush with ZSpheres
4.1.2. Transpose Master
4.1.3. Professional Finish
4.2. Rigging and Weighting of our Own Skeleton in Maya
4.2.1. Rig in Maya
4.2.2. Rigging Tools with Advanced Skeleton
4.2.3. Rig Weighting
4.3. Blend Shapes to Give Life to Your Character's Face
4.3.1. Facial Expressions
4.3.2. Blend Shapes of Maya
4.3.3. Animation with Maya
4.4. Mixamo, a Quick Way to Present Our Model
4.4.1. Mixamo
4.4.2. Mixamo Rigs
4.4.3. Animations
4.5. Lighting Concepts
4.5.1. Lighting Techniques
4.5.2. Light and Color
4.5.3. Shade
4.6. Arnold Render Lights and Parameters
4.6.1. Lights with Arnold and Maya
4.6.2. Lighting Control and Parameters
4.6.3. Arnold Parameters and Configuration
4.7. Lighting of our Models in Maya with Arnold Render
4.7.1. Lighting Set Up
4.7.2. Model Lighting
4.7.3. Mixing Light and Color
4.8. Going Deeper into Arnold: Denoising and the Different AOV
4.8.1. AOV
4.8.2. Advanced Noise Treatment
4.8.3. Denoiser
4.9. Post-Production Rendering in Photoshop
4.9.1. Image Processing
4.9.2. Photoshop: Levels and Contrasts
4.9.3. Layers: Characteristics and their Effects
Module 5. Hair Creation for Video Games and Movies
5.1. Differences Between Videogame Hair and Film Hair
5.1.1. FiberMesh and Cards
5.1.2. Tools for Hair Creation
5.1.3. Hair Software
5.2. ZBrush Hair Sculpting
5.2.1. Basic Shapes for Hairstyles
5.2.2. Creating Brushes in ZBrush for Hair
5.2.3. Curve Brushes
5.3. Hair Creation in XGen
5.3.1. XGen
5.3.2. Collections and Descriptions
5.3.3. Hair vs. Grooming
5.4. Xgen Modifiers: Give Realism to Hair
5.4.1. Clumping
5.4.2. Coil
5.4.3. Hair Guides
5.5. Color and Region Maps: for Absolute Hair Control
5.5.1. Maps of Hair Regions
5.5.2. Cuts: Curly, Shaved and Long Hair
5.5.3. Micro Detail Facial Hair
5.6. Advanced Xgen Use of Expressions and Refinement
5.6.1. Expressions
5.6.2. Utilities
5.6.3. Hair Refinement
5.7. Cards Placement in Maya for Videogame Modeling
5.7.1. Fibers in Cards
5.7.2. Cards by Hand
5.7.3. Cards and Real-Time Engine
5.8. Optimization for Movies
5.8.1. Optimization of the Hair and its Geometry
5.8.2. Preparation for Physics with Movements
5.8.3. XGen Brushes
5.9. Hair Shading
5.9.1. Arnold Shader
5.9.2. Hyper-Realistic Look
5.9.3. Hair Treatment
5.10. Render
5.10.1. Rendering When Using XGen
5.10.2. Lighting
5.10.3. Noise Elimination
Module 6. Clothing Simulation
6.1. Importing your Model to Marvelous Designer and Program Interface
6.1.1. Marvelous Designer
6.1.2. Software Functionality
6.1.3. Real-Time Simulations
6.2. Creation of Simple Patterns and Clothing Accessories
6.2.1. Creations: T-shirts, Accessories, Hats and Pockets
6.2.2. Fabric
6.2.3. Patterns, Zippers and Seams
6.3. Creation of Advanced Clothes Complex Patterns
6.3.1. Pattern Complexity
6.3.2. Physical Qualities of Fabrics
6.3.3. Complex Accessories
6.4. Clothing Simulation at Marvelous
6.4.1. Animated Models at Marvelous
6.4.2. Fabric Optimization
6.4.3. Model Preparation
6.5. Export of Clothing from Marvelous Designer to ZBrush
6.5.1. Low Poly in Maya
6.5.2. UV in Maya
6.5.3. Zbrush, Use of Reconstruct Subdiv
6.6. Refinement of Clothing
6.6.1. Workflow
6.6.2. Details in Zbrush
6.6.3. Clothing Brushes in Zbrush
6.7. Improve the Simulation with ZBrush
6.7.1. From Tris to Quads
6.7.2. UV's Maintenance
6.7.3. Final Carving
6.8. High Detail Clothing Texturing in Mari
6.8.1. Tileable Textures and Fabric Materials
6.8.2. Baking
6.8.3. Texturing in Mari
6.9. Maya Fabric Shading
6.9.1. Shading
6.9.2. Textures Created in Mari
6.9.3. Realism with Arnold Shaders
6.10. Render
6.10.1. Clothing Rendering
6.10.2. Illumination in Clothing
6.10.3. Texture Intensity
Module 7. Stylized Characters
7.1. Choice of a Stylized Character and Blocking of Base Forms
7.1.1. References and Concept Arts
7.1.2. Base Forms
7.1.3. Deformities and Fantastic Shapes
7.2. Conversion of our Low Poly to High Poly model: Head, Hair and Face Sculpting
7.2.1. Head Blocking
7.2.2. New Hair Creation Techniques
7.2.3. Improvements
7.3. Model Refinement: Hands and Feet
7.3.1. Advanced Sculpting
7.3.2. Refinement of General Shapes
7.3.3. Shape Cleaning and Smoothing
7.4. Creation of Jaw and Teeth
7.4.1. Creation of Human Teeth
7.4.2. Increase its Polygons
7.4.3. Fine Detailing of Teeth in ZBrush
7.5. Modeling Clothing and Accessories
7.5.1. Types of Cartoon Clothing
7.5.2. Zmodeler
7.5.3. Applied Maya Modeling
7.6. Retopology and Clean Topology Creation from Scratch
7.6.1. Retopology
7.6.2. Loops According to the Model
7.6.3. Optimization of the Mesh
7.7. UV Mapping and Baking
7.7.1. University of Valencia
7.7.2. Substance Painter: Baking
7.7.3. Polishing Baking
7.8. Texturing and Painting In Substance Painter
7.8.1. Substance Painter: Texturing
7.8.2. Hand Painted Cartoon Techniques
7.8.3. Fill Layers with Generators and Masks
7.9. Lighting and Rendering
7.9.1. Lighting of Our Character
7.9.2. Color Theory and Presentation
7.9.3. Substance Painter: Render
7.10. Posing and Final Presentation
7.10.1. Diorama
7.10.2. Posing Techniques
7.10.3. Presentation of Models
Module 8. Creature Modeling
8.1. Understanding Animal Anatomy
8.1.1. Study of the Bones
8.1.2. Proportions of an Animal Head
8.1.3. Anatomic Differences
8.2. Anatomy of the Skull
8.2.1. Animal Face
8.2.2. Muscles of the Head
8.2.3. Skin Layer, Over Bones and Muscles
8.3. Anatomy of the Spine and Thoracic Cage
8.3.1. Animal Torso and Hip Musculature
8.3.2. Central Axis of its Body
8.3.3. Creation of Torsos in Different Animals
8.4. Animal Musculature
8.4.1. Muscle
8.4.2. Synergy Between Muscles and Bones
8.4.3. Shapes of an Animal Body
8.5. Reptiles and Amphibians
8.5.1. Reptilian Skin
8.5.2. Small Bones and Ligaments
8.5.3. Fine Detail
8.6. Mammals
8.6.1. Fur
8.6.2. Larger, Stronger Bones and Ligaments
8.6.3. Fine Detail
8.7. Animals with Feathers
8.7.1. Plumage
8.7.2. Elastic and Light Bones and Ligaments
8.7.3. Fine Detail
8.8. Analysis of the Jaw and Creation of Teeth
8.8.1. Animal Specific Teeth
8.8.2. Detailing of Teeth
8.8.3. Teeth in the Jaw Cavity
8.9. Creation of Fur, Fur for Animals
8.9.1. XGen in Maya: Grooming
8.9.2. XGen: Feathers
8.9.3. Render
8.10. Fantastic Animals
8.10.1. Fantastic Animal
8.10.2. Complete Modeling of the Animal
8.10.3. Texturing, Lighting and Rendering
Module 9. Blender: A New Twist in the Industry
9.1. Blender VS Zbrush
9.1.1. Advantages and Differences
9.1.2. Blender and the 3D Art Industry
9.1.3. Advantages and Disadvantages of Freeware
9.2. Blender Interface and Program Knowledge
9.2.1. Interface
9.2.2. Customization
9.2.3. Experimentation
9.3. Head Sculpting and Transpolation of Controls from ZBrush to Blender
9.3.1. The Human Face
9.3.2. 3D Sculpting
9.3.3. Blender Brushes
9.4. Full Body Sculpting
9.4.1. The Human Body
9.4.2. Advanced Techniques.
9.4.3. Detail and Refinement
9.5. Retopology and UV in Blender
9.5.1. Retopology
9.5.2. University of Valencia
9.5.3. Blender UDIMs
9.6. From Maya to Blender
9.6.1. Hard Surface
9.6.2. Modifiers
9.6.3. Keyboard Shortcuts
9.7. Blender Tips & Tricks
9.7.1. Range of Possibilities
9.7.2. Geometry Nodes
9.7.3. Workflow
9.8. Nodes in Blender: Shading and Texture Placement
9.8.1. Nodal System
9.8.2. Shaders Through Nodes
9.8.3. Textures and Materials
9.9. Rendering in Blender with Cycles and Eevee
9.9.1. Cycles
9.9.2. Eevee
9.9.3. Lighting
9.10. Implementación de Blender en nuestro workflow como artistas
9.10.1. Implementation in the Workflow
9.10.2. Search for Quality
9.10.3. Types of Exports
Module 10. Creation of Organic Environments in Unreal Engine
10.1. Unreal Engine Configuration and Project Organization
10.1.1. Interface and Configuration
10.1.2. Folder Organization
10.1.3. Search for Ideas and References
10.2. Blocking an Environment in Unreal Engine
10.2.1. Primary, Secondary and Tertiary PST Elements
10.2.2. Scene Design
10.2.3. Storytelling
10.3. Terrain Modeling: Unreal Engine and Maya
10.3.1. Unreal Terrain
10.3.2. Terrain Sculpting
10.3.3. Heightmaps: Maya
10.4. Modeling Techniques
10.4.1. Rock Sculpting
10.4.2. Rock Brushes
10.4.3. Cliffs and Optimization
10.5. Creation of Vegetation
10.5.1. Speedtree Software
10.5.2. Low Poly Vegetation
10.5.3. Unreal’s Foliage System
10.6. Texturing in Substance Painter and Mari
10.6.1. Stylized Terrain
10.6.2. Hyper-realistic Texturing
10.6.3. Tips and Guidelines
10.7. Photogrammetry
10.7.1. Megascan Library
10.7.2. Agisoft Metashape Software
10.7.3. Model Optimization
10.8. Shading and Materials in Unreal Engine
10.8.1. Blending of Textures
10.8.2. Material Settings
10.8.3. Final Touches
10.9. Lighting and Post-production of our Environment in Unreal Engine
10.9.1. Scene Look
10.9.2. Types of Lights and Atmospheres
10.9.3. Particles and Fog
10.10. Cinematographic Render
10.10.1. Camera Techniques
10.10.2. Video and Screen Capture
10.10.3. Presentation and Final Finishing
Module 11. 3D Modeling with 3DS Max
11.1. 3D Modeling with 3DS Max
11.1.1. Orbit, Viewers and Views
11.1.2. Geometry Display Modes
11.1.3. Steering Wheels
11.2. Transformations and Geometry
11.2.1. Interactive and Parametric Transformations
11.2.2. Standard and Extended Primitives
11.2.3. Scaling Transformation
11.2.4. Select and Place/Select and Rotate
11.2.5. Align and Symmetry
11.3. Main Operations
11.3.1. Duplicate, Interactive Selection and Selection Groups and Elements
11.3.2. Layers, Grid, Snap and Pivot Point
11.3.3. Links, Coordinate Systems, Actions, Views and Isolate Geometry
11.4. Parametric Modifiers
11.4.1. Bend, Taper, Skew and Twist
11.4.2. Stretch and Squeeze
11.4.3. Ripple, Wave and Noise
11.4.4. Spherify, Lattice and Mirror
11.4.5. Push and Relax
11.4.6. Slice, Shell and CapHoles
11.5. Free Deformation Modifiers
11.5.1. FFD Modifiers
11.5.2. FFD Cyl
11.5.3. FFD Box
11.6. Composition Objects
11.6.1. Boolean Operations Boolean and ProBoolean
11.6.2. Objects Dispersion Scatter
11.6.3. Morphism Morph
11.7. 2D Shapes Splines
11.7.1. Splines and its Options
11.7.2. The Line and Vertex Types
11.7.3. Vertex, Segment and Splines Subobjects
11.8. 2D Shapes Advanced Splines
11.8.1. Editable Splines and use of Grid and Snap to Create 2D Shapes
11.8.2. Parametric Modifiers, FFD and Booleans with Splines
11.8.3. Extended Splines and Section
11.9. Modifiers of splines
11.9.1. Extrude
11.9.2. Bevel
11.9.3. Sweep
11.9.4. Lathe
11.10. Composition Objects Splines
11.10.1. Loft
11.10.2. Terrain
11.10.3. Shape Merge
Module 12. Advanced 3D Modeling with 3DS Max
12.1. Mesh Editing Polygonal Editing
12.1.1. Polygonal Editing EditablePoly and EditPoly
12.1.2. Panels, Selection and Flexible Selection
12.1.3. TurboSmooth, MeshSmooth and HSDS Modifier
12.2. Mesh Editing Geometry
12.2.1. Vertex, Edge and Edge Editing
12.2.2. Polygon, Element and Geometry Editing
12.2.3. Geometry Cutting Planes and Added Resolution
12.3. Mesh Editing Selection Groups
12.3.1. Geometry Alignment and Visibility
12.3.2. Selection Sub- material and Smoothing Groups
12.3.3. Surface Subdivision and Vertex Painting
12.4. Mesh Editing Surface
12.4.1. Geometry Displacement and Deformation Brush
12.4.2. Modo Plano and EditableMesh
12.4.3. Splines + Surface
12.5. Advanced Mesh Editing
12.5.1. EditablePatch
12.5.2. Model Sheet and Setup for Modeling
12.5.3. Symmetry Tracing and Symmetry
12.6. User Customization
12.6.1. Display Floater Tool and Panel Display
12.6.2. Object Properties and Preferences
12.6.3. Personalization IU Shortcuts, Menus and Colors
12.6.4. Viewer Configuration
12.7. Object Distribution
12.7.1. Orthographic View
12.7.2. Spacing Tool and SnapShot
12.7.3. Cloning and Alignment Tool
12.7.4. Matrices. Array
12.8. Geometric Operations
12.8.1. Polygonal and Parametric Combination
12.8.2. Polygonal Combination and Shapes
12.8.3. Polygonal and Boolean Combination
12.8.4. Polygonal, Spline, Parametric and Boolean Combination
12.9. Other Tools
12.9.1. Loops, Constraints and Edge Splitting
12.9.2. Isoline and Collapse Modifiers
12.9.3. Polygon Counter and Types of Optimization
12.10. Plugins and Scripts
12.10.1. Plugins and Scripts: Grass - o - Matic
12.10.2. Creation of Herbs and Fibers with Grass - or Matic
12.10.3. Plugin Greeble
12.10.4. Script Voronoi. FractureFracture
Module 13. 3D Modeling with Graphite Tool
13.1. Interface
13.1.1. Functionality
13.1.2. Enable the Tool
13.1.3. Interface
13.2. Sub-objects and Selection
13.2.1. Sub-objects
13.2.2. Modify Topology
13.2.3. Modify Selection
13.3. Edition
13.3.1. Swift Loop
13.3.2. Paint Connect
13.3.3. Constraints
13.4. Geometry
13.4.1. Relax
13.4.2. Attach and Detach
13.4.3. Create and Collapse
13.4.4. Quadrify and Slice
13.5. Tools Similar to the Polygonal Mode
13.5.1. Polygons
13.5.2. Loops
13.5.3. Tris
13.5.4. Subdivisions
13.5.5. Visibility
13.5.6. Align
13.5.7. Smoothing and Hardening
13.6. PolyDraw 1
13.6.1. Drag and Conform
13.6.2. Step Build Over the Grid
13.6.3. Step Build Over a Surface
13.7. PolyDraw 2
13.7.1. Shapes and Topology
13.7.2. Splines and Strips
13.7.3. Surface and Branches
13.8. PaintDeform
13.8.1. Pincel Shift and its Options
13.8.2. Pincel Push/Pull and its Options
13.8.3. Mirror and Other Options
13.9. Selection
13.9.1. Closed and Open Selections and Saving Selections
13.9.2. Select by Normal Surfaces, Perspective or Random Parameters
13.9.3. Select by Vertex, Distance, Symmetry or Color
13.10. Painting with Objects
13.10.1. Catalog of Objects
13.10.2. Brush Options
13.10.3. Functionality
Module 14. 3D Modeling with ZBrush
14.1.ZBrush
14.1.1. Interface and Basic Controls
14.1.2. Subtools, Symmetry, Transpose and Deformation
14.1.3. Brushes and Alphas
14.2. Main Tools
14.2.1. Masks and Polygroups
14.2.2. Subdivisions, Dynamesh y ZRemesher
14.2.3. Modify Topology, Matcaps y BPR
14.3.Modification Tools
14.3.1. Insert Multi Mesh
14.3.2. Layers and Morph Target
14.3.3. Projections and Extract
14.4. Advanced Tools
14.4.1. Crease and Bevel
14.4.2. Surface and Shadowbox
14.4.3. Decimation Master
14.5. ZSpheres and Adaptive Skin
14.5.1. ZSpheres Controls
14.5.2. ZSketch
14.5.3. Adaptive Skin
14.6. Dynamesh and Advanced ZRemesher
14.6.1. Booleans
14.6.2. Brushes
14.6.3. ZRemesher Using Guides
14.7. Curve Brushes
14.7.1. Controls and Modifiers
14.7.2. Curve Surface and Other Brushes
14.7.3. Creating Brushes with Curve
14.8. Hard Surface
14.8.1. Segments with Masks
14.8.2. PolyGroupIt
14.8.3. Panel Loops
14.8.4. ZModeler
14.8.5. Primitives
14.9. Modifiers
14.9.1. Extender and Multi Slice
14.9.2. Deformer and Blend Twist
14.9.3. Taper and Flatten
14.9.4. Bend Arc and Bend Curve
14.10. Transpose Master
14.10.1. Posing a Character with Transpose Master
14.10.2. Corregir detalles
14.10.3. Prepare Character for Rendering
Module 15. Texturing
15.1. Texturing
15.1.1. Baking
15.1.2. PBR. Physycally Based Rendering
15.1.3. Basic and Compound Texturing
15.1.4. Tileable Textures
15.2. Mapping Coordinates University of Valencia
15.2.1. Unwrap and Seams
15.2.2. UvWs Editor
15.2.3. Editor Options
15.3. Object ID
15.3.1. ID Assignment and Functionality
15.3.2. Multi-Subject Material
15.3.3. Application of Materials as Instances
15.4. HighPoly and Normal Baking in 3DS Max
15.4.1. HighPoly and LowPoly
15.4.2. Projection Settings for Normal Map Baking
15.4.3. Normal Map Texture Baking
15.4.4. Normal Map
15.5. Baking of Other Materials in 3DS Max
15.5.1. Application and Baking Diffuse Map
15.5.2. Composite Materials
15.5.3. Mask Adjustment
15.6. Retopology in 3DS Max
15.6.1. Retopology Tools
15.6.2. Graphite Tool Retopology
15.6.3. Retopology Adjustments
15.7. Textured with 3DS Max
15.7.1. Material Properties
15.7.2. Texture Baking
15.7.3. Texture Toasting Complete Map, Normal Map and AO Map
15.8. Texturing with Photoshop
15.8.1. Template Coordinates
15.8.2. Add Details in Photoshop and Reimport Template with Textures
15.8.3. Tile a Texture
15.8.4. Create Normal Map
15.9. Mapping Coordinates with Zbrush
15.9.1. UV Master:
15.9.2. Control Painting
15.9.3. Unwrap and Flatten
15.10. Texturing with Zbrush
15.10.1. Painting Mode
15.10.2. Noise Maker
15.10.3. Image Proyection
Module 16. Substance Painter Texturing
16.1. Substance Painter
16.1.1. Create New Project and Reimport Models
16.1.2. Basic Controls and Interface 2D and 3D Views
16.1.3. Baking
16.2. Baking Layers
16.2.1. World Space Normal
16.2.2. Ambient Occlusion
16.2.3. Curvature
16.2.4. Position
16.2.5. ID, Normal, Thickness
16.3. Layers
16.3.1. Base Color
16.3.2. Roughness
16.3.3. Metallic
16.3.4. Material
16.4. Masks and Generators
16.4.1. Layers and UVs
16.4.2. Masks
16.4.3. Procedural Generators
16.5. Base Material
16.5.1. Types of Material
16.5.2. Customized Generators
16.5.3. Creation of a Base Material from Scratch
16.6. Brushes
16.6.1. Predefined Parameters and Brushes
16.6.2. Alphas, Lazy Mouse and Symmetry
16.6.3. Create Custom Brushes and Save Them
16.7. Particles
16.7.1. Particle Brushes
16.7.2. Properties of Particles
16.7.3. Particles Using Masks
16.8. Projections
16.8.1. Preparing Textures
16.8.2. Stencil
16.8.3. Cloning
16.9. Substance Share/Source
16.9.1. Substance Share
16.9.2. Substance Source
16.9.3. Textures.com
16.10. Terminology.
16.10.1. Normal Map
16.10.2. Padding or Bleed
16.10.3. Mipmapping
Module 17. Rendering
17.1. Marmoset Toolbag
17.1.1. Geometry Preparation and FBX Formatting
17.1.2. Basic Concepts. Importance of Geometry
17.1.3. Links and Materials
17.2. Marmoset Toolbag Sky
17.2.1. Environmental Setting
17.2.2. Lighting Points
17.2.3. Lights outside Sky
17.3. Marmoset Toolbag Details
17.3.1. Shade and Pose
17.3.2. Procedural Materials
17.3.3. Channels and Reflection
17.4. Real-Time Rendering with Marmoset Toolbag
17.4.1. Image Export with Transparency
17.4.2. Interactive Export Marmoset Viewer
17.4.3. Film Export
17.5. Marmoset Toolbag Animated Cameras
17.5.1. Model Preparation
17.5.2. Cameras
17.5.3. Main Camera Interactive Animation
17.6. Marmoset Toolbag Advanced Animated Cameras
17.6.1. Adding New Cameras
17.6.2. Parametric Animation
17.6.3. Final Details
17.7. Marmoset Toolbag 4 Raytrace
17.7.1. Subsurface
17.7.2. Ray Tracing
17.7.3. Adding Cameras and Map Rendering
17.8. Substance Painter Rendering IRay
17.8.1. IRay Settings
17.8.2. Viewer Settings
17.8.3. Display Settings
17.9. Rendering with ZBRush
17.9.1. Material Settings
17.9.2. BPR Render and Lights
17.9.3. BPR Masks and Final Rendering in Photoshop
17.10. Keyshot Rendering
17.10.1. From Zbrush to Keyshot
17.10.2. Materials and Lighting
17.10.3. Photoshop Compositing and Final Image
Module 18. Rendering with VRay Engine in 3DS Max
18.1. VRay Render Engine Assignment
18.1.1. Preparation of the Rendering Space
18.1.2. Render Setup Options and Assign Render
18.1.3. Optimize Rendering Time
18.2. Lighting and Light Creation
18.2.1. 3-Point Lighting
18.2.2. Light Setup
18.2.3. Render Region
18.3. Creation and Application of Materials
18.3.1. VRay Materials
18.3.2. VRay Materials Settings
18.3.3. Self-Illumination
18.4. From Substance Painter to VRay
18.4.1. Connect Nodes and Material Settings
18.4.2. Export Presets
18.4.3. Set Up Smart Material in VRay
18.5. Details and Positioning in the Scene
18.5.1. Application of Shades According to the Position of the Model
18.5.2. Adjust Model and Silhouette
18.5.3. Metallic Base
18.6. Surface Rounding
18.6.1. VRayEdgeTex
18.6.2. Functionality and Setup
18.6.3. Rendering With and Without Rounding
18.7. Field of View
18.7.1. Camera and Shot
18.7.2. Camera Aperture
18.7.3. Field of View
18.8. Ambient Occlusion and Global Illumination
18.8.1. GI and Render Elements
18.8.2. VRayExtraTex and VrayDirt
18.8.3. Global Illumination Multiplier
18.9. Rendering of a Static Frame
18.9.1. Adjust Render Values
18.9.2. Save Final Render
18.9.3. Composition of Ambient Occlusion
18.10. Rendering of a Sequence
18.10.1. Camera Animation
18.10.2. Rendering Options for Sequence
18.10.3. Frame Assembly for the Sequence
Module 19. Characters
19.1. Types of Characters
19.1.1. Realistic and Cartoon/Stylized
19.1.2. Humanoids and Creatures
19.1.3. Anatomy and Proportions
19.2. Tips to Work with ZBrush
19.2.1. Work with references and transparencies. Snap and 1transformation from 2D to 3D
19.2.2. Union of Pieces with Dynamesh. Work in Pieces or Together with Polygroups and ZRemesher
19.2.3. Lazy Mouse and GoZ
19.3. Sculpting a Head in ZBrush
19.3.1. Primary Forms and Proportions
19.3.2. Eyelids and Eyes
19.3.3. Nose, Ears and Lips
19.3.4. ZRemesher for A Head
19.3.5. Eyebrows and Eyelashes
19.3.6. Detail and Refinement
19.4. Clothing
19.4.1. Clothing
19.4.2. Armor
19.4.3. Details Modeled and with Noise Maker
19.5. Modeling Tips
19.5.1. Hands
19.5.2. Stylized Hair
19.5.3. Extra Details with Alpha
19.6. Tips for Modeling Types of Materials
19.6.1. Feathers
19.6.2. Rocks or Minerals
19.6.3. Scales
19.7. Hair with ZBrush
19.7.1. Curve Brushes
19.7.2. Long Hair with Curve Brush
19.7.3. Short Hair or Animal Fur
19.8. Hair with Xgen
19.8.1. Tool Set-up and Preparation
19.8.2. Application of Modifiers and Tools in Depth
19.8.3. Illumination and Rendering
19.9. Posed with Transpose Master
19.9.1. TPoseMesh. Work with Smooth Masks, Move and Rotate
19.9.2. Importance of Silhouettes
19.9.3. TPose SubtTool. Correcting and Finishing Detailing
19.10. Character Props and Environment
19.10.1. Weapons and Accesories Elements that Tell Us about the Character's Story
19.10.2. Elements of the Environment and Background. Enhancing the character
19.10.3. The Character’s Lighting
Module 20. Exports to Unreal
20.1. Unreal Engine
20.1.1. Game Exporter
20.1.2. Create New Project and Controls
20.1.3. Importing Models into Unreal
20.2. Basic Properties of Materials
20.2.1. Create Materials and Nodes
20.2.2. Constant and Its Values
20.2.3. Texture Sample
20.3. Common Material Nodes
20.3.1. Multiply
20.3.2. Texture Coordinate
20.3.3. Add
20.3.4. Fresnel
20.3.5. Panner
20.4. Materials and Bloom
20.4.1. Linear Interpolate
20.4.2. Power
20.4.3. Clamp
20.5. Textures to Modify the Material
20.5.1. Masks
20.5.2. Transparent Textures
20.5.3. Match Color
20.6. Basic Lighting
20.6.1. Light Source
20.6.2. Skylight
20.6.3. Fog
20.7. Fill and Creative Lighting
20.7.1. Point Light
20.7.2. Spot Light y Rect Light
20.7.3. Objects as Light Sources
20.8. Night Lighting
20.8.1. Light Source Properties
20.8.2. Fog Properties
20.8.3. Skylight Properties
20.9. Lightmaps
20.9.1. Viewer Modes. Lightmap Density
20.9.2. Improving Lightmaps Resolution
20.9.3. Lightmass Importance Volume
20.10. Rendering
20.10.1. Cameras and Their Parameters
20.10.2. Basic Post-Processing
20.10.3. High Resolution Screenshot
Module 21. Study of Figure and Shape
21.1. The Geometric Figure
21.1.1. Types of Geometrical Figures
21.1.2. Basic Geometric Constructions
21.1.3. Geometric Transformations on the Plane
21.2. Polygons
21.2.1. Triangles
21.2.2. Quadrilaterals
21.2.3. Regular Polygons
21.3. Axonometric System
21.3.1. System Fundamentals
21.3.2. Types of Orthogonal Axonometry
21.3.3. Sketches
21.4. Three-Dimensional Drawing
21.4.1. Perspective and Third Dimension
21.4.2. Essential Elements of Drawing
21.4.3. Perspectives
21.5. Technical Drawing
21.5.1. Basic Notions
21.5.2. Disposition of Views
21.5.3. Cuts
21.6. Fundamentals of Mechanical Elements I
21.6.1. Axis
21.6.2. Joints and Bolts
21.6.3. Springs
21.7. Fundamentals of Mechanical Elements II
21.7.1. Bearings
21.7.2. Gears
21.7.3. Flexible Mechanical Elements
21.8. Laws of Symmetry
21.8.1. Translation– Rotation– Reflection- Extension
21.8.2. Touch– Overlay– Subtract– Intersect- Join
21.8.3. Combined Laws
21.9. Form Analysis
21.9.1. Form and Function
21.9.2. Mechanical Form
21.9.3. Types of Shapes
21.10. Topological Analysis
21.10.1. Morphogenesis
21.10.2. Composition
21.10.3. Morphology and Topology
Module 22. Hardsurface Modeling
22.1. Hardsurface Modeling
22.1.1. Topology Control
22.1.2. Function Communication
22.1.3. Speed and Efficiency
22.2. Hardsurface I
22.2.1. Hard Surface
22.2.2. Development
22.2.3. Structure
22.3. Hardsurface II
22.3.1. Applications
22.3.2. Physical Industry
22.3.3. Virtual Industry
22.4. Types of Modeling
22.4.1. Technical Modeling / NURBS
22.4.2. Polygonal Modeling
22.4.3. Sculpt Modeling
22.5. Deep Hardsurface Modeling
22.5.1. Profiles
22.5.2. Topology and Edge Flow
22.5.3. Mesh Resolution
22.6. NURBS Model
22.6.1. Dots– Lines– Polylines- Curves
22.6.2. Surfaces
22.6.3. 3D Geometry
22.7. Fundamentals of Polygonal Modeling
22.7.1. Edit Poly
22.7.2. Vortexes – Edges- Polygons
22.7.3. Surgery
22.8. Fundamentals of Sculpt Modeling
22.8.1. Basic Geometry
22.8.2. Subdivisions
22.8.3. Deformities
22.9. Topology and Retopology
22.9.1. High Poly and Low Poly
22.9.2. Polygonal Count
22.9.3. Bake Maps
22.10. UV Maps
22.10.1. UV Coordinates
22.10.2. Techniques and Strategies
22.10.3. Unwrapping
Module 23. Technical Modeling in Rhino
23.1. Rhino Modeling
23.1.1. Rhino Interface
23.1.2. Types of Objects
23.1.3. Navigating the Model
23.2. Fundamental Notions
23.2.1. Editing with Gumball
23.2.2. Viewports
23.2.3. Modeling Support
23.3. Precision Modeling
23.3.1. Input by Coordinates
23.3.2. Distance and Angle Restriction Input
23.3.3. Object Restriction
23.4. Command Analysis
23.4.1. Additional Modeling Support
23.4.2. SmartTrack
23.4.3. Construction Planes
23.5. Lines and Polylines
23.5.1. Circles
23.5.2. Free-Form Lines
23.5.3. Helix and Spiral
23.6. Geometry Editing
23.6.1. Fillet and Chamfer
23.6.2. Mixture of Curves
23.6.3. Loft
23.7. Transformations I
23.7.1. Move - Rotate– Scale
23.7.2. Join– Prune - Extend
23.7.3. Separate - Offset - Formations
23.8. Creating Shapes
23.8.1. Deformable Shapes
23.8.2. Modeling With Solids
23.8.3. Transformation of Solids
23.9. Creating Surfaces
23.9.1. Simple Surfaces
23.9.2. Extrusion, Lofting and Surface Revolution
23.9.3. Surface Sweeping
23.10. Organisation
23.10.1. Layers
23.10.2. Groups
23.10.3. Blocks
Module 24. Modeling Techniques and their Application in Rhino
24.1. Techniques
24.1.1. Support Intersection
24.1.2. Creation of a Space Helmet
24.1.3. Pipelines
24.2. Application I
24.2.1. Creating a Car Tire
24.2.2. Creating a Tire
24.2.3. Modeling a Watch
24.3. Basic Techniques II
24.3.1. Use of Isocurves and Edges for Modeling
24.3.2. Making Apertures in the Geometry
24.3.3. Working with Hinges
24.4. Application II
24.4.1. Creation of a Turbine
24.4.2. Creation of Air Inlets
24.4.3. Tips for Imitating Edge Thickness
24.5. Data Science
24.5.1. Tips for Using Mirror Symmetry
24.5.2. Use of Fillets
24.5.3. Use of Trims
24.6. Mechanical Applications
24.6.1. Gear Creation
24.6.2. Pulley Construction
24.6.3. Construction of a Shock Absorber
24.7. File Import and Export
24.7.1. Send Rhino Files
24.7.2. Export Rhino Files
24.7.3. Import to Rhino from Illustrator
24.8. Analysis Tools I
24.8.1. Graphical Curvature Analysis Tool
24.8.2. Curve Continuity Analysis
24.8.3. Curve Analysis Problems and Solutions
24.9. Analysis Tools II
24.9.1. Surface Directional Analysis Tool
24.9.2. Environment Surface Mapping Analysis Tool
24.9.3. Edge Display Analysis Tool
24.10. Strategies
24.10.1. Construction Strategies
24.10.2. Surface per Curve Grid
24.10.3. Working with Blueprints
Module 25. Advanced Modeling in Rhino
25.1. Motorcycle Modeling
25.1.1. Importing Reference Images
25.1.2. Modeling of Rear Tire
25.1.3. Modeling of Rear Rim
25.2. Mechanical Components of Rear Axle
25.2.1. Creating the Braking System
25.2.2. Building the Transmission Chain
25.2.3. Modeling the Chain Cover
25.3. Engine Modeling
25.3.1. Creation of the Body
25.3.2. Adding Mechanical Elements
25.3.3. Incorporating Technical Details
25.4. Modeling the Main Deck
25.4.1. Modeling Curves and Surfaces
25.4.2. Modeling the Deck
25.4.3. Cutting the Frame
25.5. Modeling the Upper Area
25.5.1. Building the Seat
25.5.2. Creating Front End Details
25.5.3. Creating Back End Details
25.6. Functional Parts
25.6.1. Gasoline Tank
25.6.2. Rear Lights
25.6.3. Front Lights
25.7. Building the Front Axle I
25.7.1. Brake System and Wheel Rim
25.7.2. Fork
25.7.3. Handlebar
25.8. Building the Front Axle II
25.8.1. Grips
25.8.2. Brake Cables
25.8.3. Instruments
25.9. Adding Details
25.9.1. Refining the Main Body
25.9.2. Adding the Muffler
25.9.3. Adding the Pedals
25.10. Final Components
25.10.1. Modeling the Windshield
25.10.2. Modeling the Support
25.10.3. Final Details
Module 26. Polygonal Modeling in 3D Studio Max
26.1. Reference Modeling
26.1.1. Reference Image Creation
26.1.2. Hard Surface Smoothing
26.1.3. Scene Organization
26.2. High Resolution Meshing
26.2.1. Basic Smoothed Modeling and Smoothing Groups
26.2.2. Modeling with Extrusions and Bevels
26.2.3. Using the Turbosmooth Modifier
26.3. Spline Modeling
26.3.1. Modifying Curvatures
26.3.2. Configuring Polygon Faces
26.3.3. Extruding and Spherizing
26.4. Creating Complex Shapes
26.4.1. Setting Up Components and Work Grid
26.4.2. Duplicating and Welding Components
26.4.3. Cleaning Polygons and Smoothing
26.5. Modeling With Edge Cuts
26.5.1. Creating and Positioning the Template
26.5.2. Making Cuts and Cleaning Topology
26.5.3. Extruding Shapes and Creating Folds
26.6. Modeling from Low Poly Model
26.6.1. Starting with the Basic Shape and Adding Chamfers
26.6.2. Adding Subdivisions and Generating Edges
26.6.3. Cutting, Welding and Detailing
26.7. Edit Poly I Modifier
26.7.1. Workflows
26.7.2. Interface
26.7.3. Sub Objects
26.8. Creating Compounds Objects
26.8.1. Morph, Scatter, Conform and Connect Compound Objects
26.8.2. BlobMesh, Shape Merge and Boolean Compound Objects
26.8.3. Loft, Mesher and Proboolean Compound Objects
26.9. Techniques and Strategies to Create UVs
26.9.1. Simple Geometries and Arc-Like Geometries
26.9.2. Hard Surfaces
26.9.3. Examples and Applications
Module 27. Advanced Polygonal Modeling in 3D Studio MAX
27.1. Sci-FI spacecraft Modeling
27.1.1. Creating our Workspace
27.1.2. Starting with the Main Body
27.1.3. Configuration for the Wings
27.2. The Cabin
27.2.1. Development of the Cabin Area
27.2.2. Modeling the Control Panel
27.2.3. Adding Details
27.3. The Fuselage
27.3.1. Defining Components
27.3.2. Adjusting Minor Components
27.3.3. Developing the Underbody Panel
27.4. The Wings
27.4.1. Creation of the Main Wings
27.4.2. Incorporation of the Tail
27.4.3. Adding Inserts for the Ailerons
27.5. Main Body
27.5.1. Separation of Parts into Components
27.5.2. Creating Additional Panels
27.5.3. Incorporating the Spring Doors
27.6. The Engines
27.6.1. Creating the Space for the Engines
27.6.2. Building the Turbines
27.6.3. Adding the Exhaust
27.7. Adding Details
27.7.1. Lateral Components
27.7.2. Characteristic Components
27.7.3. Refining General Components
27.8. Bonus I - Creation of the Pilot's Helmet
27.8.1. Head Block
27.8.2. Detail Refinements
27.8.3. Helmet Neck Modeling
27.9. Bonus II – Creation of the Pilot's Helmet
27.9.1. Helmet Neck Refinements
27.9.2. Steps for Final Details
27.9.3. Mesh Finishing
27.10. Bonus III – Creation of a Co-Pilot Robot
27.10.1. Development of the Shapes
27.10.2. Adding Details
27.10.3. Supporting Edges for Subdivision
Module 28. Low Poly 3D Studio MAX Modeling
28.1. Heavy Machinery Vehicle Modeling
28.1.1. Creation of the Volumetric Model
28.1.2. Volumetric Modeling of the Crawler Tracks
28.1.3. Volumetric Construction of the Shovel
28.2. Incorporating Different Components
28.2.1. Cab Volumetry
28.2.2. Volumetry of the Mechanical Arm
28.2.3. Volumetry of the Mechanical Shovel Sword
28.3. Adding Subcomponents
28.3.1. Creating Shovel Teeth
28.3.2. Adding the Hydraulic Piston
28.3.3. Connecting Subcomponents
28.4. Incorporating Details to Volumetries I
28.4.1. Creating Caterpillars
28.4.2. Incorporating Track Bearings
28.4.3. Defining the Track Housing
28.5. Incorporating Details to Volumetrics II
28.5.1. Chassis Subcomponents
28.5.2. Bearing Covers
28.5.3. Adding Parts Cuts
28.6. Incorporating Details to Volumetrics III
28.6.1. Creating Radiators
28.6.2. Adding the Hydraulic Arm Base
28.6.3. Creating the Exhaust Pipes
28.7. Incorporating Details to Volumetrics IV
28.7.1. Creating the Protective Cabin Grille
28.7.2. Adding Piping
28.7.3. Adding Nuts, Bolts and Rivets
28.8. Developing the Hydraulic Arm
28.8.1. Creating the Supports
28.8.2. Retainers, Washers, Screws and Connections
28.8.3. Creation of the Head
28.9. Developing the Cabinet
28.9.1. Defining the Housing
28.9.2. Adding Windshields
28.9.3. Door Handle and Headlight Details
28.10. Mechanical Development of the Excavator
28.10.1. Creating the Body and Teeth
28.10.2. Creating the Tooth Roller
28.10.3. Wiring with Splines, Connectors and Fasteners
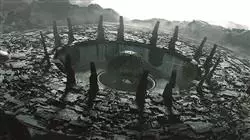
Do you want to get an advanced learning in 3D Polygonal Modeling with Studio MAX? Do it through this university degree”
Advanced Master's Degree in Integral 3D Modeling
Dive into the exciting universe of 3D modeling and unleash your creative potential with the Advanced Professional Professional Master's Degree's Degree Degree in Integral 3D Modeling from TECH Global University. Through our online classes, we offer you the opportunity to acquire specialized skills in this exciting field, which is constantly growing and in demand in today's industry. In our cutting-edge program, you will immerse yourself in the most advanced 3D modeling techniques and acquire specialized knowledge in state-of-the-art software and tools. Our team of Postgraduate Certificate teachers will guide you in the Professional Professional Master's Degree's Degreey of modeling, texturing, lighting and animation techniques, giving you a solid foundation to become a highly skilled and competitive professional in the job market. One of the main advantages of our online classes is the flexibility they offer. You will be able to access the contents from anywhere and at any time that fits your schedule, allowing you to reconcile your studies with your daily responsibilities. In addition, you will have the personalized support and guidance of our professors, who will be available to answer your questions and provide assistance at every stage of your education.
Specialize in integral 3D modeling
Advanced Master's Degree in Integral 3D Modeling
Dive into the exciting universe of 3D modeling and unleash your creative potential with TECH Global University's Advanced Master's Degree in Integral 3D Modeling. Through our online classes, we offer you the opportunity to acquire specialized skills in this exciting field, which is constantly growing and in demand in today's industry. In our cutting-edge program, you will immerse yourself in the most advanced 3D modeling techniques and acquire specialized knowledge in state-of-the-art software and tools. Our team of faculty will guide you in the mastery of modeling, texturing, lighting and animation techniques, giving you a solid foundation to become a highly skilled and competitive professional in the job market. One of the main advantages of our online classes is the flexibility they offer. You will be able to access the contents from anywhere and at any time that fits your schedule, allowing you to balance your studies with your daily responsibilities. In addition, you will have the personalized support and guidance of our professors, who will be available to answer your questions and provide assistance at every stage of your education.
Specialize in integral 3D modeling
After completing the program, you will be prepared to face the challenges of the working world in the field of 3D modeling. You will be able to apply your skills in areas such as animation, video game design, architecture, film or advertising. Don't miss the opportunity to expand your professional horizons and stand out in a constantly evolving sector full of possibilities. Join the Advanced Master's Degree in Integral 3D Modeling, taught by the Faculty of Computer Science of TECH Global University and become an expert in the fascinating world of 3D modeling. Enhance your creativity, develop high-level technical skills and build your professional future with us. Enroll up today and bring your ideas to life in the virtual world!
