University certificate
The world's largest faculty of video games”
Why study at TECH?
Broaden your professional horizons and perfect your handling of Blender, 3ds Max, Zbrush and other key tools in your career as a digital artist"
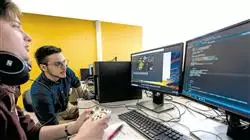
The digital entertainment industry has experienced exponential growth in recent years, especially in the creation of video games. This phenomenon has generated a great demand for professionals specialized in Digital Art for Video Games, able to design characters, environments, objects and scenarios that meet the demands of the industry and provide an unforgettable gaming experience to the user.
In this context, TECH has developed this Advanced master’s degree in Digital Art for Video Games, with the aim of comprehensively training professionals for this constantly evolving industry. Students enrolled in this program will have the opportunity to acquire a wide range of skills and knowledge in the field of digital art, and will be trained to work in high-level video game development studios.
During the program, students will delve into key areas such as professional drawing, volume, aesthetics, color, character and scenario design, and anatomy. They will also study industry programs and tools, such as Photoshop, Clip Studio Paint and Procreate, mastering all their intricacies. They will also have the opportunity to develop teamwork skills, project analysis and visual narrative, with the aim of being prepared to make a significant leap in the labor market.
A relevant aspect of the program is its 100% online format, which allows students to access content from anywhere and at any time. This will provide them with greater flexibility and freedom to adjust the teaching to their schedules and personal needs, without having to sacrifice any of their own responsibilities.
Boost your creativity and develop your own artistic style, giving a noticeable boost to your portfolio, with this TECH Advanced master’s degree"
This Advanced master’s degree in Digital Art for Video Games contains the most complete and up-to-date program on the market. The most important features include:
- The development of case studies presented by experts in artistic design for video games
- The graphic, schematic, and practical contents with which they are created, provide scientific and practical information on the disciplines that are essential for professional practice
- Practical exercises where self-assessment can be used to improve learning
- Special emphasis on innovative methodologies in Creation and Models for Video Games
- Theoretical lessons, questions to the expert, debate forums on controversial topics, and individual reflection assignments
- Content that is accessible from any fixed or portable device with an Internet connection
Explore the creative potential of the most striking virtual worlds, analyzing art in 2D, 3D and Virtual Reality"
It includes in its teaching staff professionals belonging to the field of video games, who pour into this program the experience of their work, in addition to recognized specialists of reference societies and prestigious universities.
The multimedia content, developed with the latest educational technology, will provide the professional with situated and contextual learning, i.e., a simulated environment that will provide an immersive learning experience designed to prepare for real-life situations.
This program is designed around Problem-Based Learning, whereby the student must try to solve the different professional practice situations that arise throughout the program. For this purpose, the professional will be assisted by an innovative interactive video system created by renowned and experienced experts.
Master professional drawing techniques, volume, aesthetics, color and anatomy for video game design with this Advanced master’s degree"
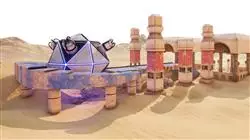
Enroll now and discover the fundamentals of clothing and scenery design, integrating the different roles of the artist in a transversal work group"
Syllabus
The syllabus of this program has been designed with the academic needs of journalism professionals in the field of audiovisual business management in mind. A very complete syllabus that covers fundamental issues of business administration, but also the most relevant aspects of the audiovisual industry. Undoubtedly, a highly valuable Advanced master’s degree for those who wish to specialize in this field and make a qualitative leap in their career.
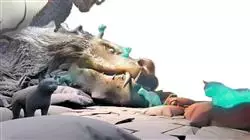
Discover an innovative content adapted to the most demanding artistic demands in the field of video games"
Module 1. Professional Drawing
1.1. Materials
1.1.1. Traditional
1.1.2. Digital
1.1.3. Environment
1.2. Ergonomics and Heating
1.2.1. Warm-Ups
1.2.2. Rest
1.2.3. Health
1.3. Geometric Shapes
1.3.1. Line
1.3.2. Ellipses
1.3.3. 3D Shapes
1.4. Perspectives
1.4.1. A Vanishing Point
1.4.2. Multiple Leakage Points
1.4.3. Advice
1.5. Sketch
1.5.1. Lace
1.5.2. Digital vs. Traditional
1.5.3. Clean
1.6. Line Art
1.6.1. About Sketch
1.6.2. Digital
1.6.3. Advice
1.7. Shading in Drawing
1.7.1. Plots
1.7.2. Blurring
1.7.3. Filling
1.8. Simplify Shapes
1.8.1. Organic Shapes
1.8.2. Structures
1.8.3. Fusion of Simple Shapes
1.9. Means of Ink Filling
1.9.1. Ink
1.9.2. Ballpoint Pen
1.9.3. Digital
1.10. Line Improvement
1.10.1. Exercises
1.10.2. Line Combing
1.10.3. Practice
Module 2. Volume
2.1. 3D Shapes
2.1.1. 2D to 3D
2.1.2. Mixing Shapes
2.1.3. Study
2.2. Shadows on Planes
2.2.1. Lack of Light
2.2.2. Light Direction
2.2.3. Shadows on Different Objects
2.3. Ambient Occlusion
2.3.1. Definition
2.3.2. Light Difficulty
2.3.3. Contact
2.4. Shadows in Anatomy
2.4.1. Face
2.4.2. Human Body Plans
2.4.3. Lighting
2.5. Narrative Shading
2.5.1. Example
2.5.2. When to Use
2.5.3. Exaggeration
2.6. Comic Shading
2.6.1. Styles
2.6.2. Plots
2.6.3. Authors
2.7. Sleeve Shading
2.7.1. Styles
2.7.2. Authors
2.7.3. Implementation
2.8. Plots
2.8.1. Traditional
2.8.2. Digital
2.8.3. Wefts Made
2.9. Volume and Perspective
2.9.1. Without Shading
2.9.2. Shapes
2.9.3. Implementation
2.10. Volume by Color
2.10.1. Depth
2.10.2. Shape
2.10.3. Brushstroke
Module 3. Esthetics
3.1. Styles
3.1.1. Seniority
3.1.2. Modern
3.1.3. Video Games
3.2. Modern Styles and Canon
3.2.1. 8 Heads
3.2.2. Disney
3.2.3. Video Games
3.3. American Style
3.3.1. Comics
3.3.2. Illustration
3.3.3. Animation
3.4. Asian Style
3.4.1. Manga
3.4.2. Anime
3.4.3. Traditional
3.5. European Style
3.5.1. History
3.5.2. Comic
3.5.3. Illustration
3.6. Aesthetics by Gender
3.6.1. Infantile/Juvenile
3.6.2. Fantasy
3.6.3. Other
3.7. Canons
3.7.1. History
3.7.2. Canons
3.7.3. Flexibility
3.8. Styling
3.8.1. The Human Being
3.8.2. Adaptation
3.8.3. Shapes
3.9. Visual Storytelling
3.9.1. Meaning
3.9.2. Intention
3.9.3. Environment
3.10. Own Style
3.10.1. Analysis
3.10.2. Practice
3.10.3. Advice
Module 4. Color
4.1. Light Propagation
4.1.1. Technicality
4.1.2. Example
4.1.3. Light Color
4.2. Light on Surfaces
4.2.1. Reflexes
4.2.2. Bounces
4.2.3. Subsurface Scattering
4.3. Design and Color
4.3.1. Exaggeration
4.3.2. Imagination
4.3.3. Use
4.4. Light in Shadows
4.4.1. Reflexes
4.4.2. Color in the Shadows
4.4.3. Tricks
4.5. HUE/Matrix
4.5.1. Definition
4.5.2. Importance
4.5.3. Use
4.6. Saturation
4.6.1. Definition
4.6.2. Importance
4.6.3. Use
4.7. Value
4.7.1. Definition
4.7.2. Contrast in Art Work
4.7.3. Use
4.8. Color in Illustration
4.8.1. Differences
4.8.2. Freedom
4.8.3. Theory
4.9. Color in Concept Art
4.9.1. Importance
4.9.2. Design and Color
4.9.3. Prop Scenario Character
4.10. Color in Art
4.10.1. History
4.10.2. Changes
4.10.3. Reference:
Module 5. Programs in the Industry
5.1. Photoshop
5.1.1. In the industry
5.1.2. Basics
5.1.3. Recommendations
5.2. Clip Studio Paint
5.2.1. Differences
5.2.2. What Makes It Unique?
5.2.3. For Whom?
5.3. Procreate
5.3.1. iPad
5.3.2. In the industry
5.3.3. Future
5.4. Alternative Programs
5.4.1. Krita
5.4.2. Aseprite
5.4.3. Others
5.5. Photoshop Interface
5.5.1. Data Science
5.5.2. Personalization
5.5.3. Advice
5.6. Photoshop Layers
5.6.1. Layer Styles
5.6.2. Mask Layer
5.6.3. Advice
5.7. Photoshop Brushes
5.7.1. Where to Find?
5.7.2. Create your Own
5.7.3. Use
5.8. Format and Dimensions
5.8.1. JPG vs. PNG
5.8.2. Bits
5.8.3. Image Resolution
5.9. Color in Photoshop
5.9.1. One Layer
5.9.2. Multiple Layers
5.9.3. Advice
5.10. Digitized from Traditional Media
5.10.1. Scanning
5.10.2. Photoshop Editing
5.10.3. Erase Colors
Module 6. 2D in the Video Game Industry
6.1. Digital Entertainment Industry
6.1.1. Currently
6.1.2. Competition
6.2. Concept Art
6.2.1. Importance
6.2.2. Types
6.2.3. Movies/Video Games
6.3. Illustration
6.3.1. Illustration for Video Games
6.3.2. Uses
6.3.3. Recommendations
6.4. UI Artist
6.4.1. Use
6.4.2. Design
6.4.3. History
6.5. Environment Artist
6.5.1. Difference
6.5.2. Importance
6.5.3. India
6.6. Pixel Art
6.6.1. Currently
6.6.2. Advice
6.6.3. Programs
6.7. Animators
6.7.1. 3D
6.7.2. 2D in Video Games
6.7.3. Advice
6.8. Storyboarder
6.8.1. Importance
6.8.2. Large Studios
6.8.3. In Video Games
6.9. Splash Art
6.9.1. Online
6.9.2. Currently
6.9.3. Advice
6.10. Art Director
6.10.1. Importance
6.10.2. India
6.10.3. Competition
Module 7. Anatomy
7.1. Lace and Organic Shapes
7.1.1. Practice
7.1.2. Complexity
7.1.3. Routine
7.2. References
7.2.1. Live
7.2.2. Websites
7.2.3. Good References
7.3. Skeleton Simple Shapes
7.3.1. Understanding
7.3.2. About Images
7.3.3. Simplify
7.4. Complex Skeleton
7.4.1. Progress
7.4.2. Nomenclature
7.4.3. From Simple to Complex
7.5. Muscles
7.5.1. About References
7.5.2. Muscles for Utility
7.5.3. Body Types
7.6. Cranium
7.6.1. Structure
7.6.2. Loomins
7.6.3. Advice
7.7. The Human Face
7.7.1. Proportions
7.7.2. Common Errors
7.7.3. Advice
7.8. Anatomy Profile
7.8.1. Advice
7.8.2. Differences
7.8.3. Construction
7.9. Anatomy 3/4
7.9.1. What to Consider
7.9.2. Advice
7.9.3. Differences
7.10. Color of the Human Body
7.10.1. Translucency
7.10.2. Color in the Shadows
7.10.3. Tones
Module 8. Develop Drawing
8.1. Drawing from Imagination
8.1.1. Start
8.1.2. Practices
8.1.3. Advice
8.2. Search and Development of References
8.2.1. Different References
8.2.2. Pinterest
8.2.3. References to Avoid
8.3. Routines
8.3.1. Routine
8.3.2. Enjoying Your Studies
8.3.3. Breaks
8.4. Drawing of Poses
8.4.1. Pages
8.4.2. Time
8.4.3. Daily
8.5. Develop a Notebook
8.5.1. What Notebook?
8.5.2. When
8.5.3. Contents
8.6. Getting out of the Comfort Zone
8.6.1. Change
8.6.2. Abstraction
8.7. Testing Styles
8.7.1. Authors
8.7.2. Different
8.7.3. Study it
8.8. Buscar feedback
8.8.1. Friendships
8.8.2. Social media
8.8.3. Do Not Take It Personally
8.9. Participate in Communities
8.9.1. Online Communities
8.9.2. City Events
8.10. Improving the Fundamentals
8.10.1. Practices
8.10.2. Back
8.10.3. Redo
Module 9. Design in Video Games
9.1. Video Game Design
9.1.1. Design and Video Games
9.1.2. Concept
9.2. Ideation
9.2.1. References
9.2.2. Written
9.2.3. Sketches
9.3. Iteration
9.3.1. Silhouettes
9.3.2. Advice
9.3.3. Shape Design
9.4. Character Design
9.4.1. Psychology of the Character
9.4.2. Color
9.4.3. Details
9.5. Props Design
9.5.1. Shape
9.5.2. Uses
9.5.3. Importance
9.6. Scenario Design
9.6.1. Composition
9.6.2. Details
9.6.3. Depth
9.7. Clothing Design
9.7.1. Reference:
9.7.2. Inspiration
9.7.3. Originality
9.8. Color in Design
9.8.1. Meaning
9.8.2. Psychology
9.8.3. Focal Points
9.9. Utility on Site
9.9.1. Video Game Industry
9.9.2. 3D Equipment
9.9.3. Project
9.10. Artistic Show Design
9.10.1. Pitch Deck
9.10.2. Finished Work
9.10.3. Cleaning
Module 10. Art Industry for Videogames: Musts
10.1. Professional Image
10.1.1. Showcase your Work
10.1.2. Popularity
10.1.3. Communities
10.2. Portfolio
10.2.1. Pages
10.2.2. Physical
10.2.3. Advice
10.3. Submitting Jobs
10.3.1. Clean Sketches
10.3.2. Mount
10.3.3. Format
10.4. Portfolio
10.4.1. Advice
10.4.2. Language:
10.4.3. Date:
10.5. Practices
10.5.1. Relations
10.5.2. Hybrid
10.6. Social media
10.6.1. Art Station
10.6.2. LinkedIn
10.6.3. Instagram
10.7. Web
10.7.1. Platforms
10.7.2. Portfolio
10.7.3. Contact
10.8. Teamwork
10.8.1. Advice
10.8.2. Communication
10.8.3. Importance
10.9. Telecommuting
10.9.1. Timetable
10.9.2. Discipline
10.9.3. Language:
Module 11. The Project and the Unity Graphics Engine
11.1. The Design
11.1.1. Pureref
11.1.2. Scaling
11.1.3. Differences and Limitations
11.2. Project Planning
11.2.1. Modular Planning
11.2.2. Blockout
11.2.3. Assembly
11.3. Visualization in Unity
11.3.1. Setting up Unity for Oculus
11.3.2. The Oculus App
11.3.3. Collision and Camera Adjustments
11.4. Visualization in Unity: Scene
11.4.1. Setting up Scene for VR
11.4.2. Export of APKs
11.4.3. Installing APKs on Oculus Quest 2
11.5. Materials in Unity
11.5.1. Standard
11.5.2. Unlit: Features of This Material and When to Use It
11.5.3. Optimization
11.6. Textures in Unity
11.6.1. Importing Textures
11.6.2. Transparency
11.6.3. Sprite
11.7. Lighting
11.7.1. VR Lighting
11.7.2. Lighting Menu in Unity
11.7.3. VR Skybox
11.8. Lighting: Lightmapping
11.8.1. Lightmapping Settings
11.8.2. Types of Lights
11.8.3. Emissive
11.9. Lighting 3: Baking
11.9.1. Baking
11.9.2. Ambient Occlusion
11.9.3. Optimization
11.10. Organizing and Exporting
11.10.1. Folders
11.10.2. Prefab
11.10.3. Exporting and Importing Unity Packages
Module 12. Blender
12.1. Interface
12.1.1. Software Blender
12.1.2. Controls and Shortcuts
12.1.3. Scenes and Customization
12.2. Modeling
12.2.1. Data Science
12.2.2. Mesh
12.2.3. Curves and Surfaces
12.3. Modifiers
12.3.1. Modifiers
12.3.2. How Are They Used?
12.3.3. Types of Modifiers
12.4. Hard Surface Modeling
12.4.1. Prop Modeling
12.4.2. Prop Modeling’s Evolution
12.4.3. Prop Modeling’s Final Assessment
12.5. Materials
12.5.1. Assignment and Components
12.5.2. Creating Materials
12.5.3. Creating Procedural Materials
12.6. Animation and Rigging
12.6.1. Keyframes:
12.6.2. Armatures
12.6.3. Constraints
12.7. Simulation
12.7.1. Fluids
12.7.2. Hair and Particles
12.7.3. Clothing
12.8. Rendering
12.8.1. Cycles and Eevee
12.8.2. Light
12.8.3. Cameras
12.9. Grease Pencil
12.9.1. Structure and Primitives
12.9.2. Properties and Modifiers
12.9.3. Examples:
12.10. Geometry Nodes
12.10.1. Attributes
12.10.2. Types of Nodes
12.10.3. Practical Example
Module 13. 3ds MAX
13.1. Interface Set-up
13.1.1. Project Start
13.1.2. Automatic and Incremental Saving
13.1.3. Measuring Units
13.2. The Create Menu
13.2.1. Objects
13.2.2. Light
13.2.3. Cylindrical and Spherical Objects
13.3. The Modify Menu
13.3.1. The Menu
13.3.2. Button Configuration
13.3.3. Uses
13.4. Edit Poly: Polygons
13.4.1. Edit Poly Mode
13.4.2. Edit Polygons
13.4.3. Edit Geometry
13.5. Edit Poly: Selection
13.5.1. Selection
13.5.2. Soft Selection
13.5.3. IDs and Smoothing Groups
13.6. Hierarchy Menu
13.6.1. Pivot Conditions
13.6.2. Reset XFom and Freeze Transform
13.6.3. Adjusting the Pivot Menu
13.7. Material Editor
13.7.1. Compact Material Editor
13.7.2. Slate Material Editor
13.7.3. Multi/Sub-Object
13.8. Modifier List
13.8.1. Modeling Modifiers
13.8.2. Modeling Modifier Evolution
13.8.3. Modeling Modifier Final Assessment
13.9. XView and Non-Quads
13.9.1. XView
13.9.2. Checking for Errors in Geometry
13.9.3. Non-Quads
13.10. Exporting to Unity
13.10.1. Triangulating the Asset
13.10.2. DirectX u OpenGL for Normal Maps
13.10.3. Conclusions
Module 14. ZBrush
14.1. ZBrush
14.1.1. Polymesh
14.1.2. Subtools
14.1.3. Gizmo 3D
14.2. Creating Meshes
14.2.1. Quick Mesh and Primitives
14.2.2. Mesh Extract
14.2.3. Booleans
14.3. Sculpting
14.3.1. Symmetry
14.3.2. Main Brushes
14.3.3. Dynamesh
14.4. Masks
14.4.1. Brushes and the Mask Menu
14.4.2. Brush Masks
14.4.3. Polygroups
14.5. Organic Prop K’s Sculpting
14.5.1. Sculpting Low Poly
14.5.2. Low-Poly Sculpting Evolution
14.5.3. Low Poly Sculpting Final Assessment
14.6. IMM Brushes
14.6.1. Controls
14.6.2. Inserting Multi Mesh
14.6.3. Creating IMM Brushes
14.7. Curve Brushes
14.7.1. Controls
14.7.2. Creating Curve Brushes
14.7.3. IMM Curve Brushes
14.8. High Poly
14.8.1. Subdivisions and Dynamic Subdivisions
14.8.2. HD-Geometry
14.8.3. Projecting Noise
14.9. Other Types of Mesh
14.9.1. MicroMesh
14.9.2. NanoMesh
14.9.3. ArrayMesh
14.10. High Poly Organic PropSculpting
14.10.1. Prop Sculpting
14.10.2. Prop Sculpting Evolution
14.10.3. Prop Sculpting Final Assessment
Module 15. Retopology
15.1. Retopology in ZBrush-ZRemesher
15.1.1. ZRemesher
15.1.2. Guidelines
15.1.3. Examples:
15.2. Retopology in ZBrush-Decimation Master
15.2.1. Decimation Master
15.2.2. Combining It with Brushes
15.2.3. Workflow
15.3. Retopology in ZBrush-ZModeler
15.3.1. Zmodeler
15.3.2. Modes
15.3.3. Correcting Meshes
15.4. Prop Retopology
15.4.1. Hard Surface Prop Retopology
15.4.2. Organic Prop Retopology
15.4.3. Hand Retopology
15.5. Topogun
15.5.1. Advantages of Topogun
15.5.2. The Interface
15.5.3. Import
15.6. Tools: Edit
15.6.1. Simple Edit Tool
15.6.2. Simple Create Tool
15.6.3. Draw Tool
15.7. Tools: Bridge
15.7.1. Bridge Tool
15.7.2. Brush Tool
15.7.3. Extrude Tool
15.8. Tools: Pipelines
15.8.1. Tubes Tool
15.8.2. Symmetry Set-Up
15.8.3. Feature Subdivision and Map Baking
15.9. Head Retopology
15.9.1. Facial Loops
15.9.2. Mesh Optimization
15.9.3. Export
15.10. Full Body Retopology
15.10.1. Body Loops
15.10.2. Mesh Optimization
15.10.3. VR Requirements
Module 16. UVs
16.1. Advanced UVS
16.1.1. Warnings
16.1.2. Cuts
16.1.3. Texture Density
16.2. Creating UVS in ZBrush-UVMaster
16.2.1. Controls
16.2.2. Unwrap
16.2.3. Unusual Topology
16.3. UVMaster: Painting
16.3.1. Control Painting
16.3.2. Creating Seams
16.3.3. Checkseams
16.4. UVMaster: Packing
16.4.1. UV Packing
16.4.2. Creating Islands
16.4.3. Flatten
16.5. UVMaster: Clones
16.5.1. Working With Clones
16.5.2. Polygroups
16.5.3. Control Painting
16.6. Rizom UV
16.6.1. Rizom Script
16.6.2. The Interface
16.6.3. Importing With or Without UVS
16.7. Seams and Cuts
16.7.1. Keyboard Shortcuts
16.7.2. 3D Panel
16.7.3. UV Panel
16.8. UV Unwrap and Layout Panel
16.8.1. Unfold
16.8.2. Optimize
16.8.3. Layout and Packing
16.9. UV: More Tools
16.9.1. Align, Straighten, Flip, and Fit
16.9.2. TopoCopy and Stack1
16.9.3. Edge Loop Parameters
16.10. Advanced UV Rizom
16.10.1. Auto Seams
16.10.2. UVs Channels
16.10.3. Texel Density
Module 17. Baking
17.1. Model Baking
17.1.1. Preparing the Model for Baking
17.1.2. Baking Principles
17.1.3. Processing Options
17.2. Model Baking Painter
17.2.1. Baking in Painter
17.2.2. Low Poly Baking
17.2.3. High Poly Baking
17.3. Model Baking: Boxes
17.3.1. Using Boxes
17.3.2. Adjusting Distances
17.3.3. Computing Tangent Space per Fragment
17.4. Map Baking
17.4.1. Normal
17.4.2. ID
17.4.3. Ambient Occlusion
17.5. Map Baking: Curvatures
17.5.1. Curvature
17.5.2. Thickness
17.5.3. Improving Map Quality
17.6. Baking in Marmoset
17.6.1. Marmoset
17.6.2. Functions
17.6.3. Real-Time Baking
17.7. Setting Up the Document for Baking in Marmoset
17.7.1. High Poly and Low Poly in 3DS Max
17.7.2. Organizing the Scene in Marmoset
17.7.3. Verifying That Everything Is Correct
17.8. Bake Project Panel
17.8.1. Bake Group, High and Low
17.8.2. Geometry Menu
17.8.3. Load
17.9. Advanced Options
17.9.1. Output
17.9.2. Adjusting the Cage
17.9.3. Setting Up Maps
17.10. Baking
17.10.1. Maps
17.10.2. Result Preview
17.10.3. Baking Floating Geometry
Module 18. Substance Painter
18.1. Creating a Project
18.1.1. Importing Maps
18.1.2. UVs
18.1.3. Baking
18.2. Layers
18.2.1. Types of Layers
18.2.2. Layer Options
18.2.3. Materials
18.3. Painting
18.3.1. Types of Brushes
18.3.2. Filling Projections
18.3.3. Advance Dynamic Painting
18.4. Effects
18.4.1. Filling
18.4.2. Levels
18.4.3. Anchor Points
18.5. Masks
18.5.1. Alphas
18.5.2. Procedurals and Grunges
18.5.3. Hard Surfaces
18.6. Generators
18.6.1. Generators
18.6.2. Uses
18.6.3. Examples:
18.7. Filters
18.7.1. Filters
18.7.2. Uses
18.7.3. Examples:
18.8. Hard Surface Prop Texturing
18.8.1. Prop Texturing
18.8.2. Prop Texturing Evolution
18.8.3. Prop Texturing Final Assessment
18.9. Organic Prop Texturing
18.9.1. Prop Texturing
18.9.2. Prop Texturing Evolution
18.9.3. Prop Texturing Final Assessment
18.10. Render
18.10.1. IRay
18.10.2. Post-Processing
18.10.3. Col Use
Module 19. Marmoset
19.1. The Alternative
19.1.1. Import
19.1.2. Interface
19.1.3. Viewport
19.2. Classic
19.2.1. Scene
19.2.2. Tool Settings
19.2.3. History
19.3. Inside Scene
19.3.1. Render
19.3.2. Main Camera
19.3.3. Sky
19.4. Lights
19.4.1. Types
19.4.2. Shadow Catcher
19.4.3. Fog
19.5. Texture
19.5.1. Texture Project
19.5.2. Map Import
19.5.3. Viewport
19.6. Layers: Paint
19.6.1. Paint Layer
19.6.2. Fill Layer
19.6.3. Group
19.7. Layers: Adjustments
19.7.1. Adjustment Layer
19.7.2. Input Processor Layer
19.7.3. Procedural Layer
19.8. Layers: Masks
19.8.1. Mask
19.8.2. Channels
19.8.3. Maps
19.9. Materials
19.9.1. Types of Material
19.9.2. Settings
19.9.3. Applying Them to the Scene
19.10. Dossier
19.10.1. Marmoset Viewer
19.10.2. Exporting Render Images
19.10.3. Exporting Videos
Module 20. Sci-Fi Environment
20.1. Sci-Fi Concept and Planning
20.1.1. References
20.1.2. Planning
20.1.3. Blockout
20.2. Implementation in Unity
20.2.1. Importing Blockout and Verifying Scaling
20.2.2. Skybox
20.2.3. Files and Preliminary Materials
20.3. Module 1: Floors
20.3.1. High to Low Modular Modeling
20.3.2. UVS and Baking
20.3.3. Texturing
20.4. Module 2: Walls
20.4.1. High to Low Modular Modeling
20.4.2. UVS and Baking
20.4.3. Texturing
20.5. Module 3: Roofs
20.5.1. High to Low Modular Modeling
20.5.2. Retopology, UVs, and Baking
20.5.3. Texturing
20.6. Module 4: Extras (Pipes, Railings, Etc.)
20.6.1. High to Low Modular Modeling
20.6.2. UVS and Baking
20.6.3. Texturing
20.7. Hero Asset 1: Mechanical Doors
20.7.1. High to Low Modular Modeling
20.7.2. Retopology, UVs, and Baking
20.7.3. Texturing
20.8. Hero Asset 2: Hibernation Chamber
20.8.1. High to Low Modular Modeling
20.8.2. Retopology, UVs, and Baking
20.8.3. Texturing
20.9. In Unity
20.9.1. Importing Textures
20.9.2. Application of Materials
20.9.3. Scene Lighting
20.10. End of Project
20.10.1. VR Visualization
20.10.2. Prefab and Export
20.10.3. Conclusions
Take advantage of the online format and access the content whenever you want, and you can even download it to your tablet, smartphone or computer of choice"
Advanced Master's Degree in Digital Art for Video Games
The world of video games has experienced exponential growth in recent years, and with it the demand for highly trained professionals in the field of digital art for video games. At TECH Global University, a global leader in distance education, we are committed to providing cutting-edge training in this field, and that is why we have developed our Advanced Master's Degree program in Digital Art for Video Games. This virtual Postgraduate Certificate in offers a complete and updated deepening in the techniques, tools and creative processes necessary to develop quality digital art in the video game industry. All from an immersive digital environment, with flexible classes that you can manage autonomously.
The Advanced Master's Degree program in Digital Art for Video Games at TECH Global University addresses topics such as character and scenario conceptualization, level design, 3D modeling and animation, texturing, lighting and visual effects, among others. Participants will have the opportunity to develop their creativity and technical skills through practical and collaborative projects, and will be supported by experts in the field of digital art for video games. Get the degree you need to excel in the video game industry with our Advanced Master's Degree program at TECH Global University.
